Last updated at Tue, 12 Dec 2023 19:29:02 GMT
For complete visibility into the vulnerabilities in your environment, proper authentication to web apps in InsightAppSec is essential. In this article, we’ll look at issues you might encounter with macro, traffic, and selenium authentication and how to troubleshoot them. Additionally, you’ll get practical and actionable tips on using InsightAppSec to its full potential.
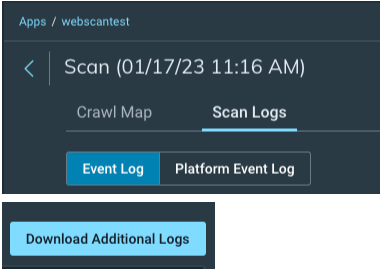
The first step to troubleshooting InsightAppSec authentication is to look over the scan logs. The scan logs can be located under the scan in the upper left hand corner. The logs can give you useful information such as if the authentication fails, the website is unavailable, or if any other problems arose during the scan.
- Event log will give you information about the scan itself.
- Platform event log will give you information about the scan engine and if it encountered any issues during the scan.
- Download additional logs: If you wanted to dive even deeper into what happened during the scan, you can to to look into the full scan logs.
Let’s look at some of the specific issues you might encounter with the different types of authentication noted above.
Macro Authentication
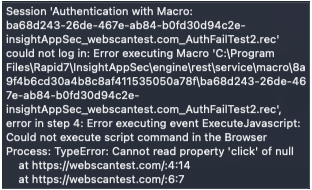
When a macro fails, the logs will give you the specific step where the macro had trouble. For example, in the image below, we can see that the macro failed on step 4, where it could not click on the specific object on the page. This could be caused by the page not loading quick enough, the name or ID of the element path changing, or the web app UI being different.
If you determine that the macro failed because the page isn’t loading fast enough, there are two ways you can slow the macro down.
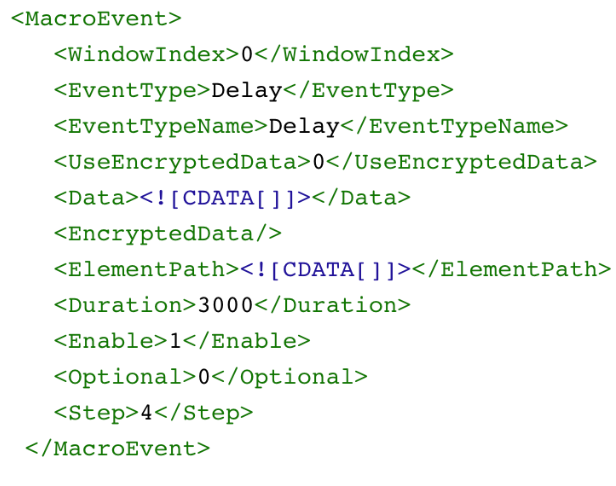
The first way is to manually add a delay between the steps that are running too quickly. You can copy any of the delays that are currently in the macro, paste them into the spot that you want to slow down, and then change the step numbers. This way you can also set the specific duration for any delays you add into your macro.
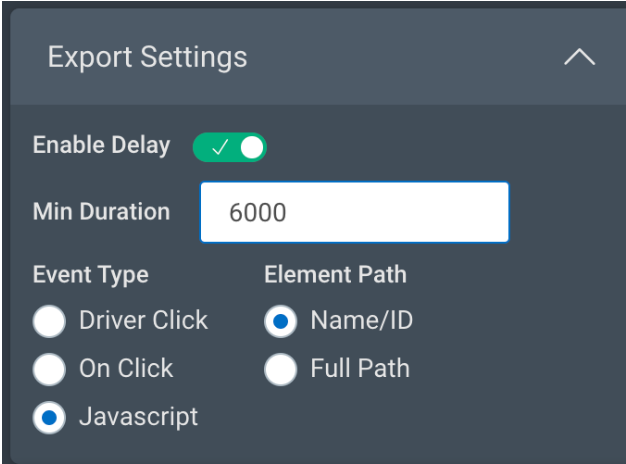
The second way is to add additional delays throughout the macro, and change the Min Duration so the delays last longer. This is controlled via the export settings menu on the right. The default minimum duration is set to 3,000 milliseconds (3 seconds). Increasing the duration or adding delays will cause the macro to take longer to authenticate, but when running a scan overnight an extra few minutes to ensure the login works is a good tradeoff.
One other potential problem when recording a macro is when you have a password manager autofill the username and password. Anything that is automatically filled in will not be recorded by the macro. It is recommended to either turn off any password managers when recording a macro, or recording in Incognito/private browsing with all other plugins disabled to ensure nothing can modify or mess with the recording.
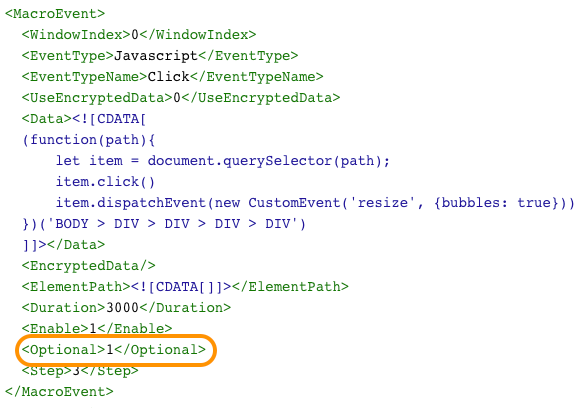
Lastly, if you have any events on your web app, such as a prompt to join a mailing list, that does not happen every time, you can mark that macro event as optional. If the event is not marked optional, then the macro will fail as it is unable to see the element on the page. Simply change the optional flag in the macro recording from 0 to 1 and you’re all set.
Traffic Authentication
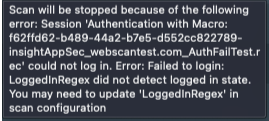
While traffic authentication is usually successful when the login is working, there could still be some problems with playback. When traffic authentication fails, the scan logs don’t give you specific information like with macro authentication. Instead, the traffic authentication fails with the LoggedInRegex did not detect logged in state error. If you can’t get the traffic authentication working in the Rapid7 Appsec Plugin, you can always record the authentication within your browser.
For Chrome:
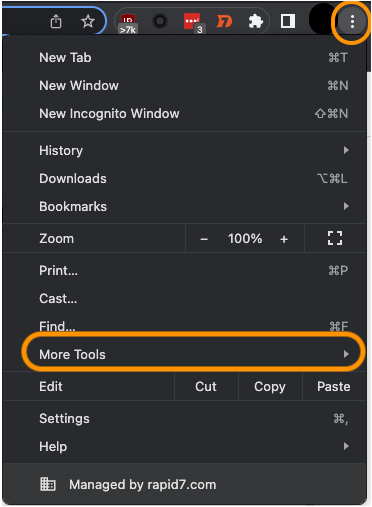
- Click on the hamburger menu in the upper right.
- Go to More Tools → Developer Options
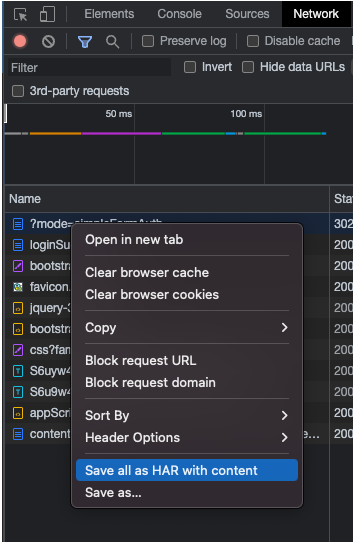
- Click on Network in the top tab
- Make sure the dot in the upper left is red to signify you are recording.
- Log in to your web app and when complete, right click on the recorded traffic and click Save all as HAR with content.
This will download the same .HAR file that the Appsec Plugin records, allowing you to use it for scanning.
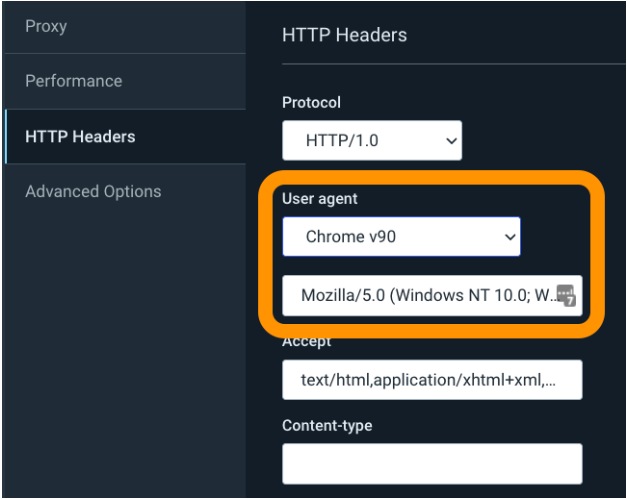
Depending on how your web app responds, you might need to change the Use agent setting for how InsightAppsec interacts with your app.
Under your scan configuration, if you go to advanced options → HTTP Headers → User agent, you can then change what user agent is used to reach out to your web app. The latest version of Chrome should be fine for most modern web apps, but if you’re scanning a mobile app or an app that hasn’t been updated in a few years it might benefit from being changed.
Additional information can be found here.
Selenium Authentication
The third primary type of authentication is selenium. Selenium is similar to the macro authentication where you record all the actions to log in to your web app. Selenium is similar to traffic authentication where you will usually receive the LoggedInRegex did not detect logged in state error in the scan logs rather than specific information about the failure.
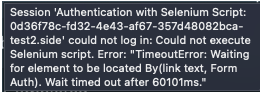
If the Selenium script could not find specific elements on the web page, you could also receive the Could not execute Selenium script error. This means there’s a problem with the script itself, the page didn’t load fast enough, or it couldn’t find the specific element on the web page. If this happens, try re-recording the script or adding a delay.
Using the plugin to record selenium scripts:
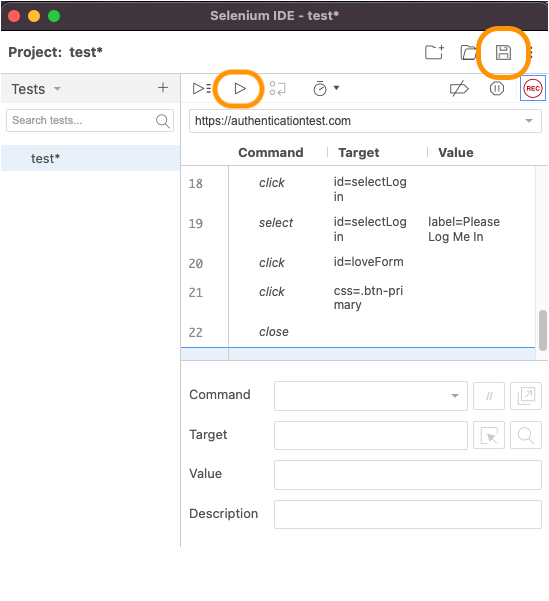
- Click on the selenium plugin and Record a new test in a new project.
- Give the project a name and enter in the base URL where you want recording to start.
- In the new window that appears, log in to your web app. Once complete, close out of the window.
- Before saving, you can click on the play icon to replay and test your selenium script.
- Review the recording and then click on the save button in the upper right. You can then upload the .side file into InsightAppSec.
Just like macro authentication, if your website takes a while to load and the selenium script is running too fast, you can add additional delays to slow it down. There are implicit waits built into the IDE commands but if those don’t work for you, after running the authentication, you can add in wait for element commands to your selenium script.
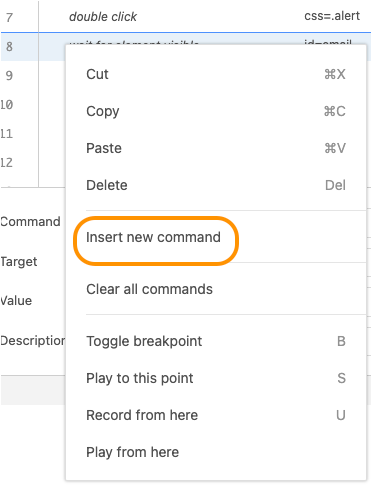
- Right click on the selenium recording and click insert new command
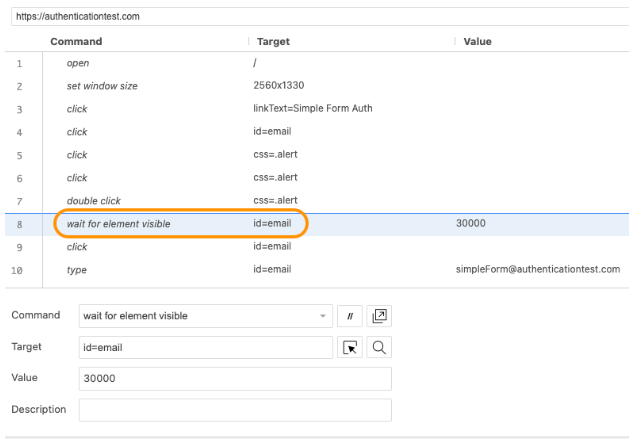
- Set the command to wait for element visible
- Set the target to the element you want to wait for. In this case, we’re waiting for id=email
- By default the value is set to wait for 30,000 milliseconds (30 seconds)
Alternatively, you can use the pause command and set the value to how long you want the script to pause for. However, it is recommended to use the wait for element visible command if the web app responds at different times.
Additional information can be found here.
Logged-In Regex Errors
After ensuring the macro, traffic, and selenium files are working correctly, the next step in the authentication process is the logged-in regex. After the login is complete, InsightAppSec will look at the web page to find a logout button or look at the browser header for a session cookie. This can be modified by clicking into the scan configuration, navigating to the Authentication tab, and clicking on Additional Settings on the left.
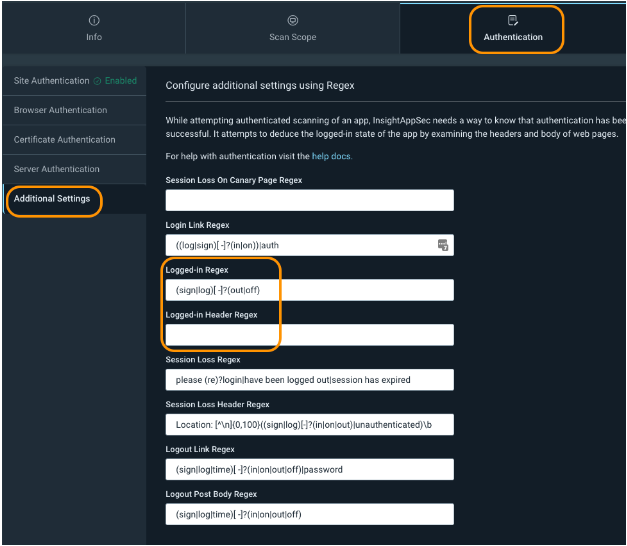
Logged-in Regex
By default, the logged-in regex looks for sign out, sign off, log out and log off, with and without spaces between the words, on the web page.
One common problem is logged-in regex not seeing the logout button on the page before ending the authentication recording. If the logout button is on another page, or sometimes under a dropdown menu, the logged-in regex won’t detect it on the page, causing the authentication to fail.
Another common issue is if the logout button is an image or otherwise can’t be detected on the page. As the field is looking for a regular expression, you can use other words on the page to determine that the login was successful. You have to ensure that the word only appears on the page after logging in, such as the username. Otherwise the login might not actually be successful.
Logged-in Header Regex
Depending on how your web app is structured, you might need to use the logged-in header regex instead. For example, if there is no logout button, or if you have a single page web app that calls javascript files, the logged-in regex is more likely to fail. What you can do instead is grab the session ID cookie from the web browser, and if that is detected, then the regex will be successful.
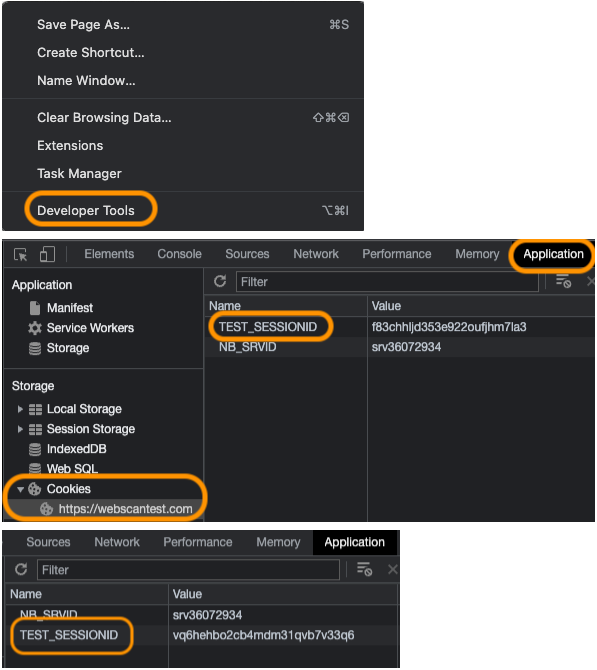
In Chrome:
- Click on the three dots in the upper right corner
- Then go to more tools and then developer options.
- Click on the application tab at the top, then cookies on the left, and finally the web app cookie.
- From there you want to find the session information cookie that only appears after logging in to the web app. Grab the name of the cookie and place that in the logged-in header regex.
The logged-in regex and logged-in header regex use AND logic, so if you put information in both fields, it will then need both to be successful in order for the login to work. Alternatively, if you remove the regex from both fields, it won’t run any post authentication checks, assuming the login is successful. It is recommended to do that as a last resort, you won't be alerted if the login does start failing or if there are any other problems.

Other common issues and tricks
One issue you might encounter is where you start the authentication recording. For example, starting the recording after a page redirect. If your web app redirects to another page or SSO, and you start the authentication recording after the redirect, InsightAppSec won’t have the session information to properly redirect back to the target web app when it gets replayed during the scan. It is recommended to always start your recording on the root web app directory wherever possible.
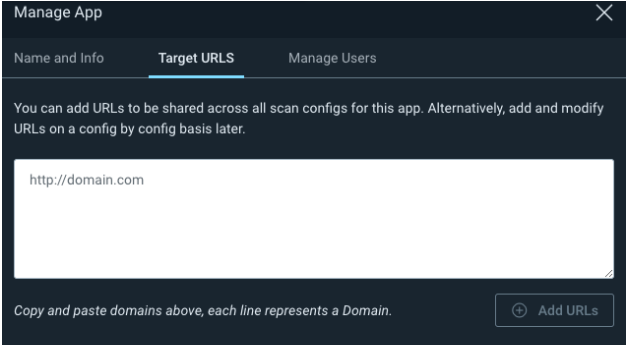
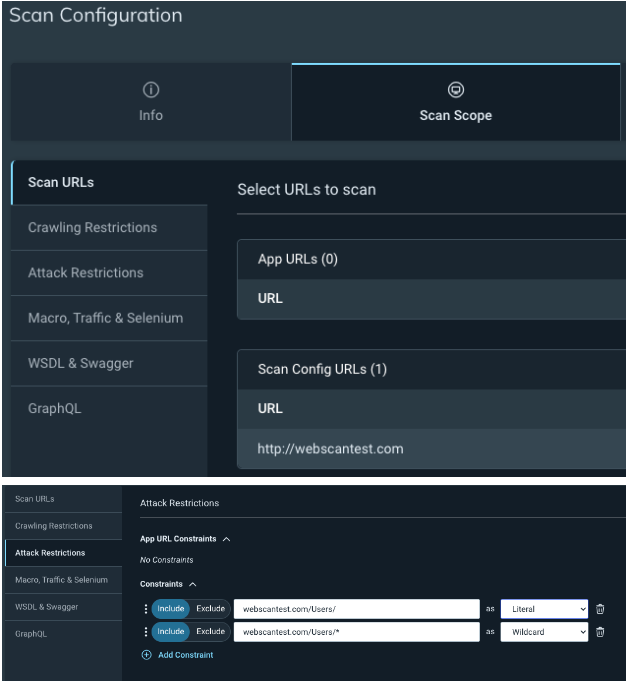
You can also choose specific directories for scanning versus the entire web app. You want to remove the URL from the app Target URLs, and add it in specifically under the scan config. You can then set the target directory in the crawl and attack configs as literal, and then add a /* wildcard to hit any subdirectories.
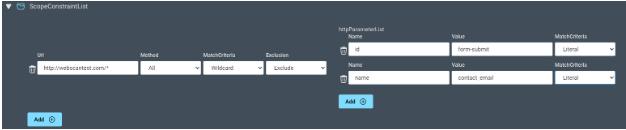
Lastly, there is a way to restrict certain elements on a web page from being scanned. Under advanced options → CrawlConfig and AttackerConfig, there’s an option called ScopeConstraintList. This is where you can explicitly include or exclude specific pages from being scanned. You can take it a step further by adding a httpParameterList to explicitly exclude certain elements on the page from being scanned. For example, if you have a contact us page and you don't want the scanner to hit the submit button, you can add it to the httpParameterList so it won’t be touched.
Below is an example of what the fields look like in the web page source code, and how it can be configured in IAS.
Email field source code: input type="email" name="contact_email"
Submit button source code: <button id="form-submit"
The entire site is in scope, and we are telling IAS not to hit the submit button or the email field.
You can find the Selenium and AppSec plugins below: