Last updated at Tue, 08 Nov 2022 19:07:48 GMT
Welcome back to our blog series on Rapid7's IoT Village exercise from DEF CON 30. In our previous posts, we covered how to achieve access to flash memory, how to extract file system data from the device, and how to modify the data we've extracted. In this post, we'll cover how to gain root access over the device's secure shell protocol (SSH).
Gaining root access over SSH
Before we move on to establishing SSH connect as root, you may need to set the local IP address on your local host to allow you to access the cable modem at its default IP address of 192.168.100.1. In our example, we set the local IP address to 192.168.100.100 to allow this connection.
To set the local IP address on your host, the first thing is to identify the local ethernet interface. You can do this from the Linux CLE terminal by running the ifconfig command:
- ifconfig
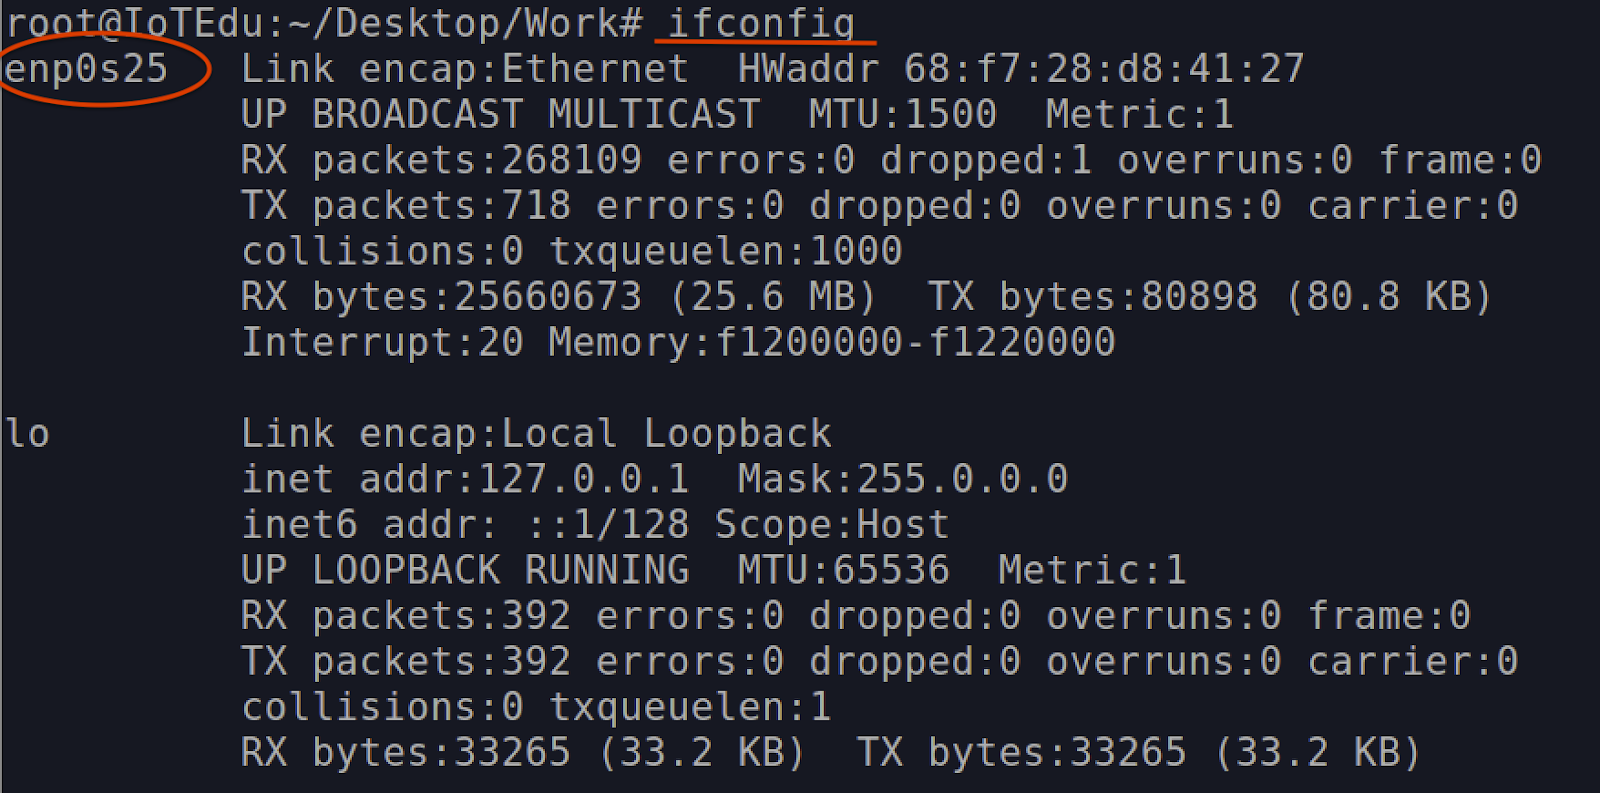
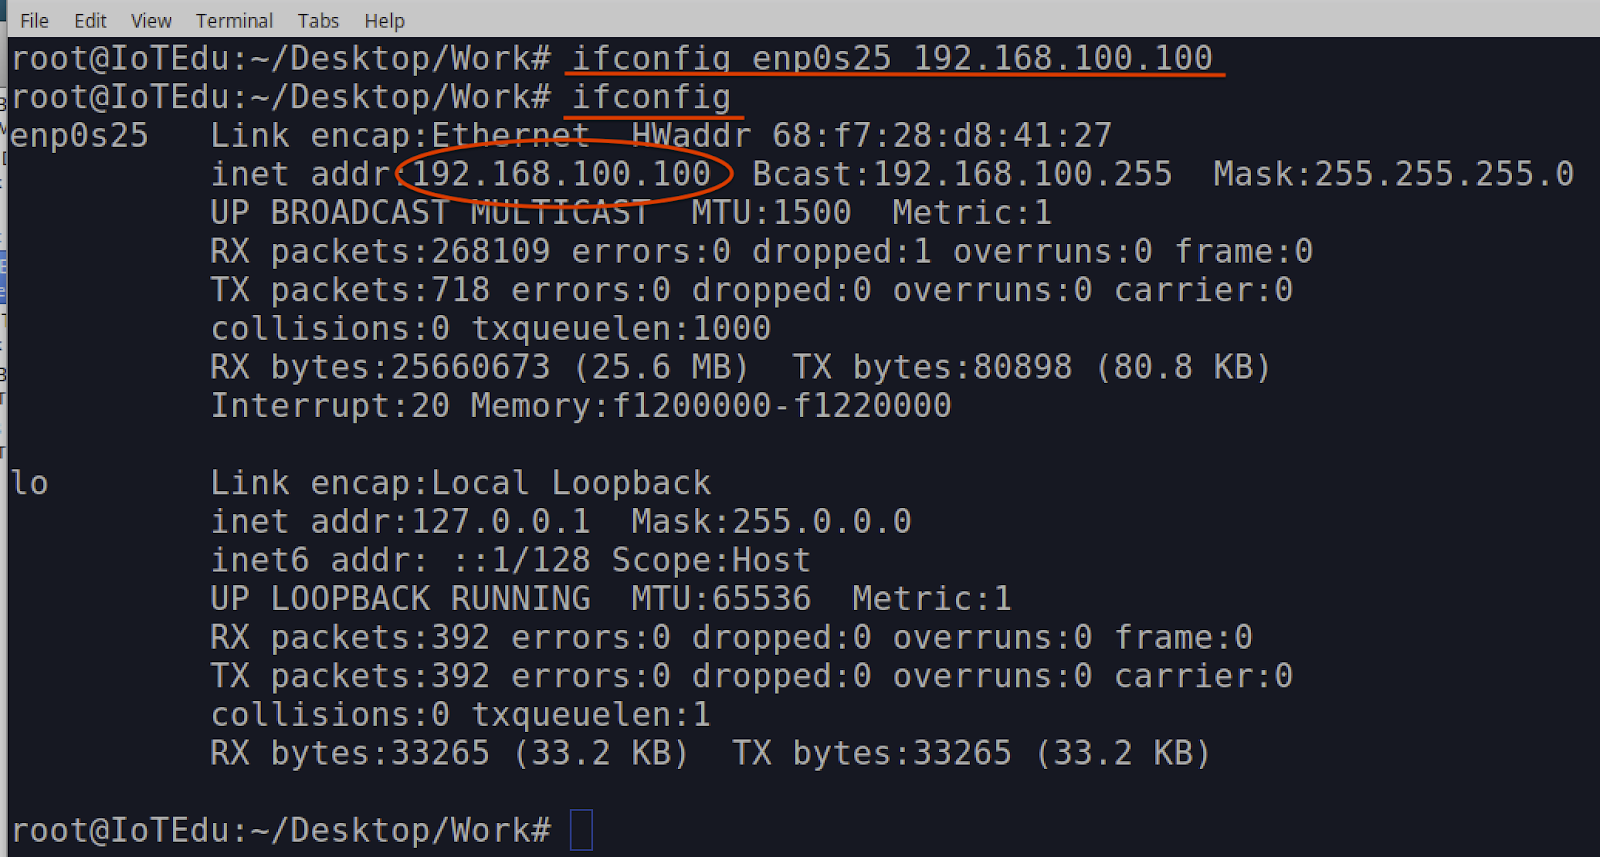
In our example, the ethernet interface is enp0s25, as shown above. Using that interface name (enp0s25), we can set the local IP address to 192.168.100.100 using the following command
- ifconfig enp0s25 192.168.100.100
To validate that you've set the correct IP address, you can rerun the ifconfig command and examine the results to confirm:
It's also possible to connect your host system directly to the cable modem's ethernet port and have your host interface setup for DHCP – the cable modem should assign an IP address to your host device.
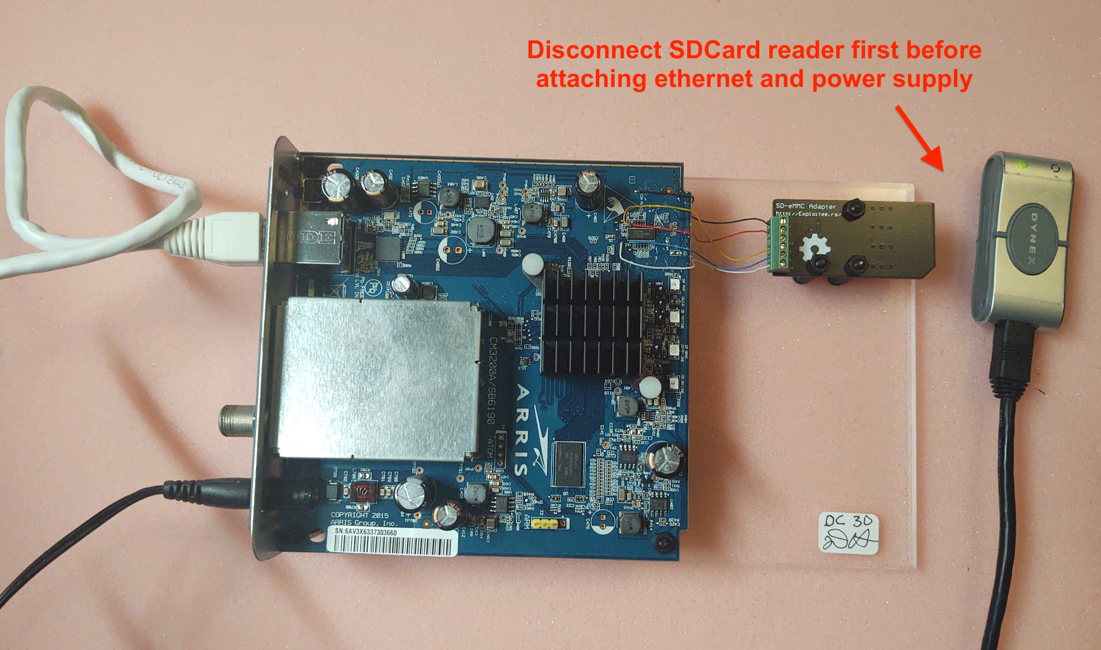
Once you have a valid IP address assigned and/or configured on your host system, power up the cable modem and see if your changes were made correctly and if you now have root access. Again, ensure the SD Card reader is disconnected before plugging 12v power supply into the cable modem.
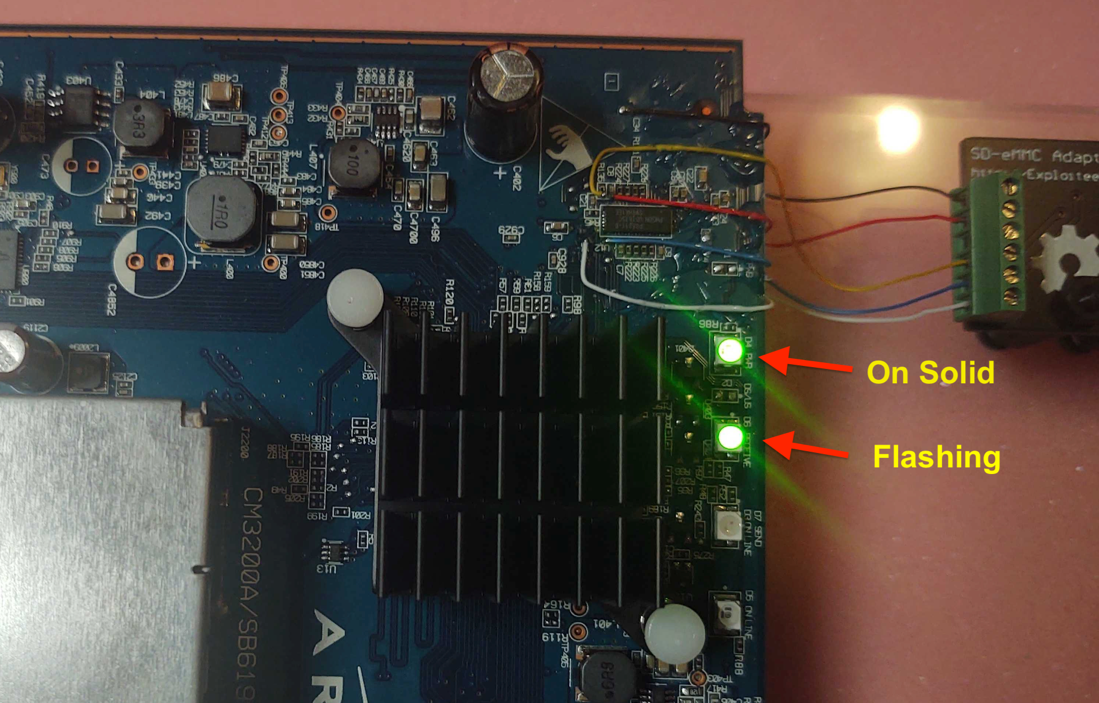
Once you've confirmed that the SD Card reader is disconnected, power up the cable modem and wait for the boot-up sequence to complete. Boot-up is complete when only the top LED is lit and the second LED is flashing:
From the CLI terminal on your host, you can run the nmap command to show the open ports on the cable modem. This will also show if your changes to the cable modem firmware were made correctly.
- nmap -sS 192.168.100.1 -p 22,80,443,1337
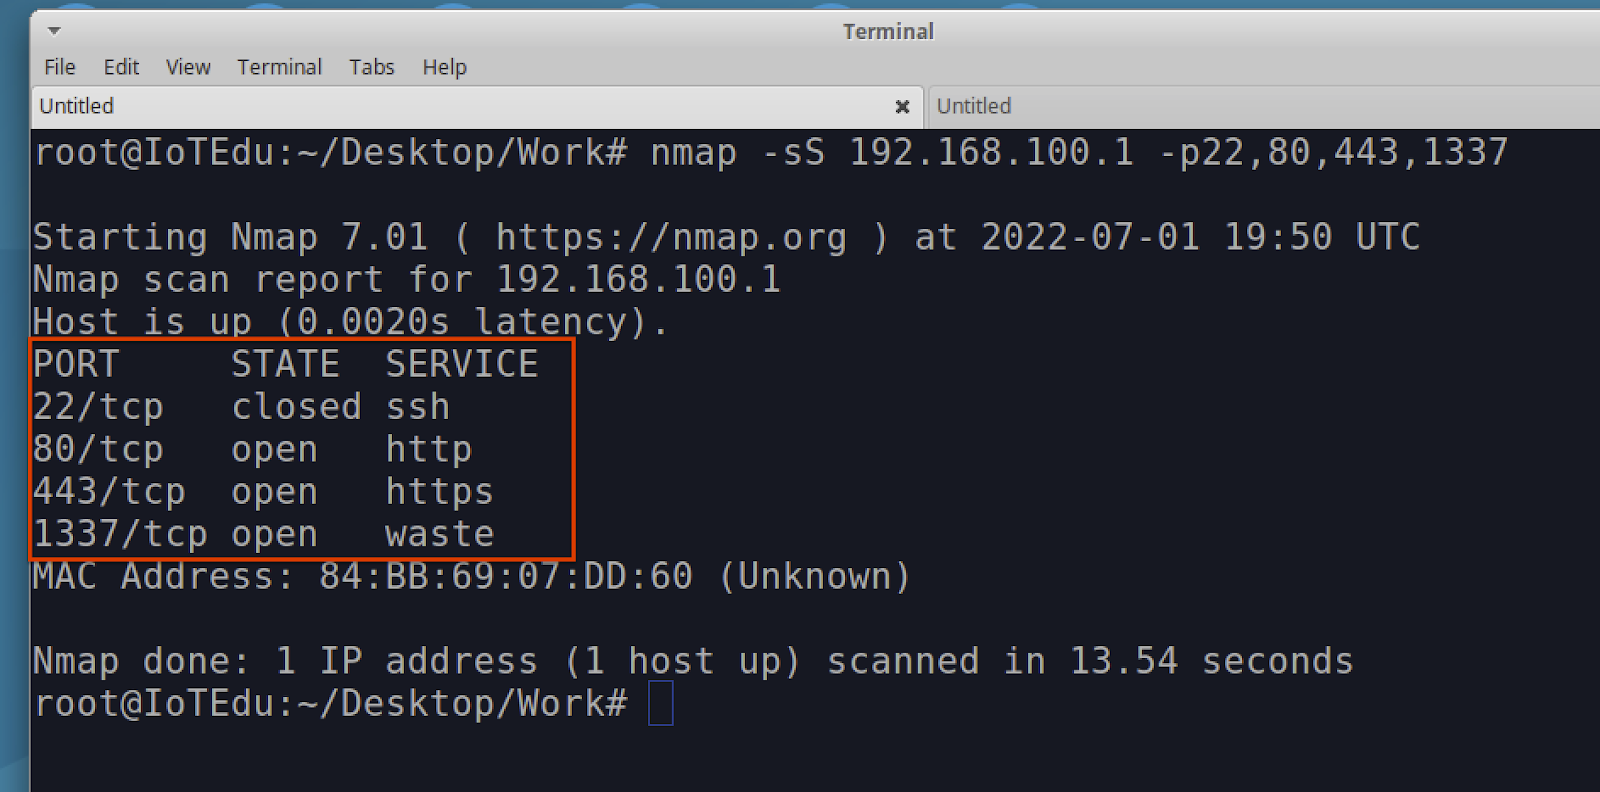
At a minimum, you should see TCP port 1337 as open as shown above in Figure 12. If not, then most likely an error was made either when copying the dropbear_rsa_key file or making changes to the inittab file.
If the TCP port 1337 is open, the next step is to attempt to login to the cable modem with the following SSH command as root. When prompted for password, use “arris" in all lower case.
Note: Since the kernel on this device is believed to have created an environment restriction to prevent console access, we were only successful in getting around that restriction with the -T switch. This -T switch in SSH disables all pseudo-terminal allocation, and without using it, no functioning console can be established. Also, when connected, you will not receive a typical command line interface prompt, but the device should still accept and execute commands properly.
- ssh -T root@192.168.100.1 -p 1337
If you receive a “no matching key exchange method found" error (Figure 13), you will need to either define that Diffie-hellman-group-sha1 in the SSH command or create a config file to do this automatically.

Defining a config file is the easier method. We did this prior to the DEF CON IoT Village, so participants in the exercise would not need to. Since others may be using this writeup to recreate the exercise, I decided to add this to prevent any unnecessary confusion.
To create a config file to support SSH login to this cable modem, without error, you will need to create the following folder “.ssh" and file “config" within the home directory of the user you are logging as. In our example, we were logged in as root. To get to the home folder, the simplest method is to enter the “cd" command without any arguments. This will take you to the home directory of the logged in user.
- cd
Once in your home directory, try to change directory “cd" to the “.ssh" folder to see if one exists:
- cd .ssh
If it does, you won't need to create one and can skip over the creation steps below. If not, then you will need to create that folder in your home directory with the following command:
- mkdir .ssh
Once you have changed directory “cd" to the .ssh folder, you can use vi to create and edit a config file.
- vi config
Once in vi, make the following entries in the config file shown below in Figure 14. These entries will enable support for access to cable modem at 192.168.100.1, for the user root, a Cipher of aes256-cbd, and the Diffie-hellman key exchange.
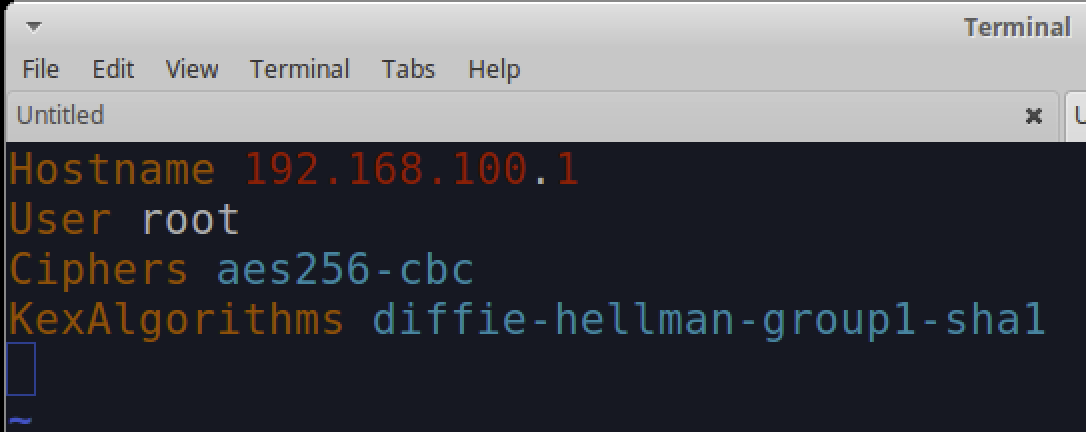
Once the config is created and saved, you should be able to login over SSH to the cable modem and not receive any more errors.
When you connect and log in, the SSH console will not show you a typical command prompt. So, once you hit the return key after the above SSH command, run the command “ls -al" to show a directory and file listing on the cable modem as shown below in Figure 15. This should indicate whether you successfully logged in or not.
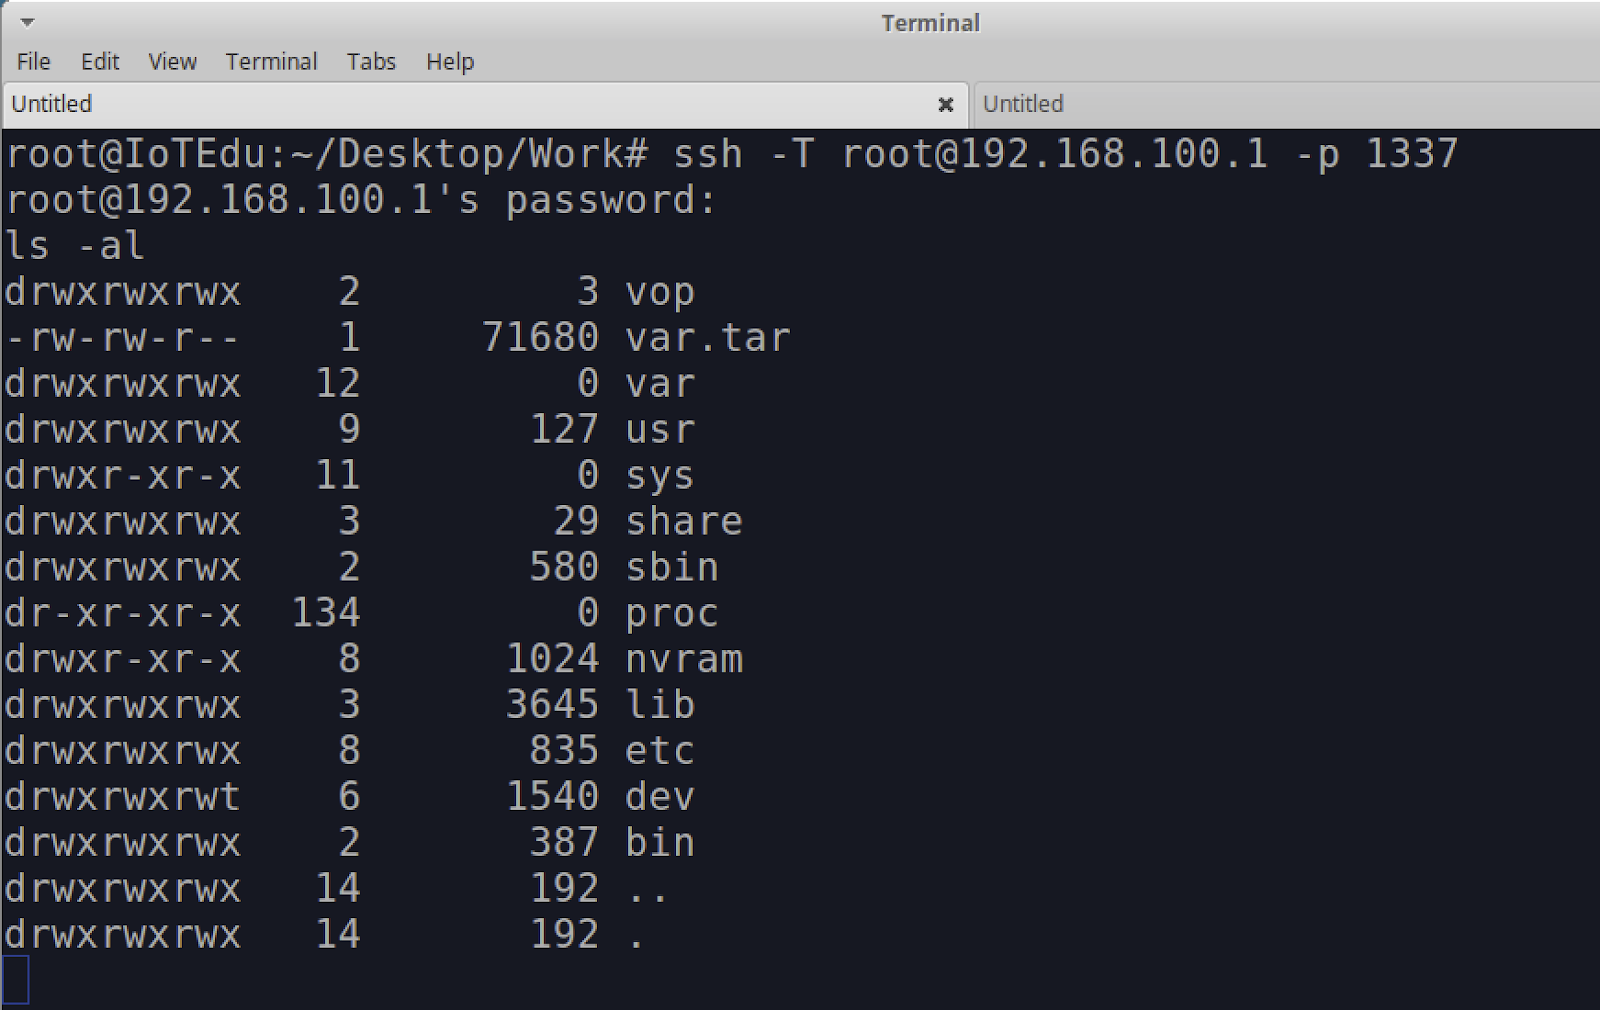
At this point, you should now have root-level access to the cable modem over SSH.
You may ask, “What do I gain from getting this level of root access to an IoT device?" This level of access allows us to do more advanced and detailed security testing on a device. This is not as easily done when sitting on the outside of the IoT device or attempting to emulate on some virtual machine, because often, the original hardware contains components and features that are difficult to emulate. With root-level access, we can interact more directly with running services and applications and better monitor the results of any testing we may be conducting.