Last updated at Mon, 02 Mar 2020 14:23:04 GMT
When you think of cloud computing, the two biggest players that likely come to mind are Amazon AWS and Microsoft Azure. As more companies make the move to the cloud, these two have become the largest names in the cloud computing space. However, Google (being Google) also threw its hat in the ring by creating its own rival cloud service, Google Cloud.
In this blog post, we’ll go over how to set up our vulnerability scanner, InsightVM in your Google Cloud and how to tweak it for your environment.
Get started with the Google Cloud
Your first step is to go about creating a Google Cloud account. If you already have a Google account, this process is simple, as it will use your pre-existing account to log in. Once you’re in, it will have you add a credit card to your account. Don’t worry, as of this blog post, you get $300 in free credit when you sign up, and when this runs out, your card won’t be automatically charged unless you manually upgrade to a paid account.
Making a virtual machine (VM)
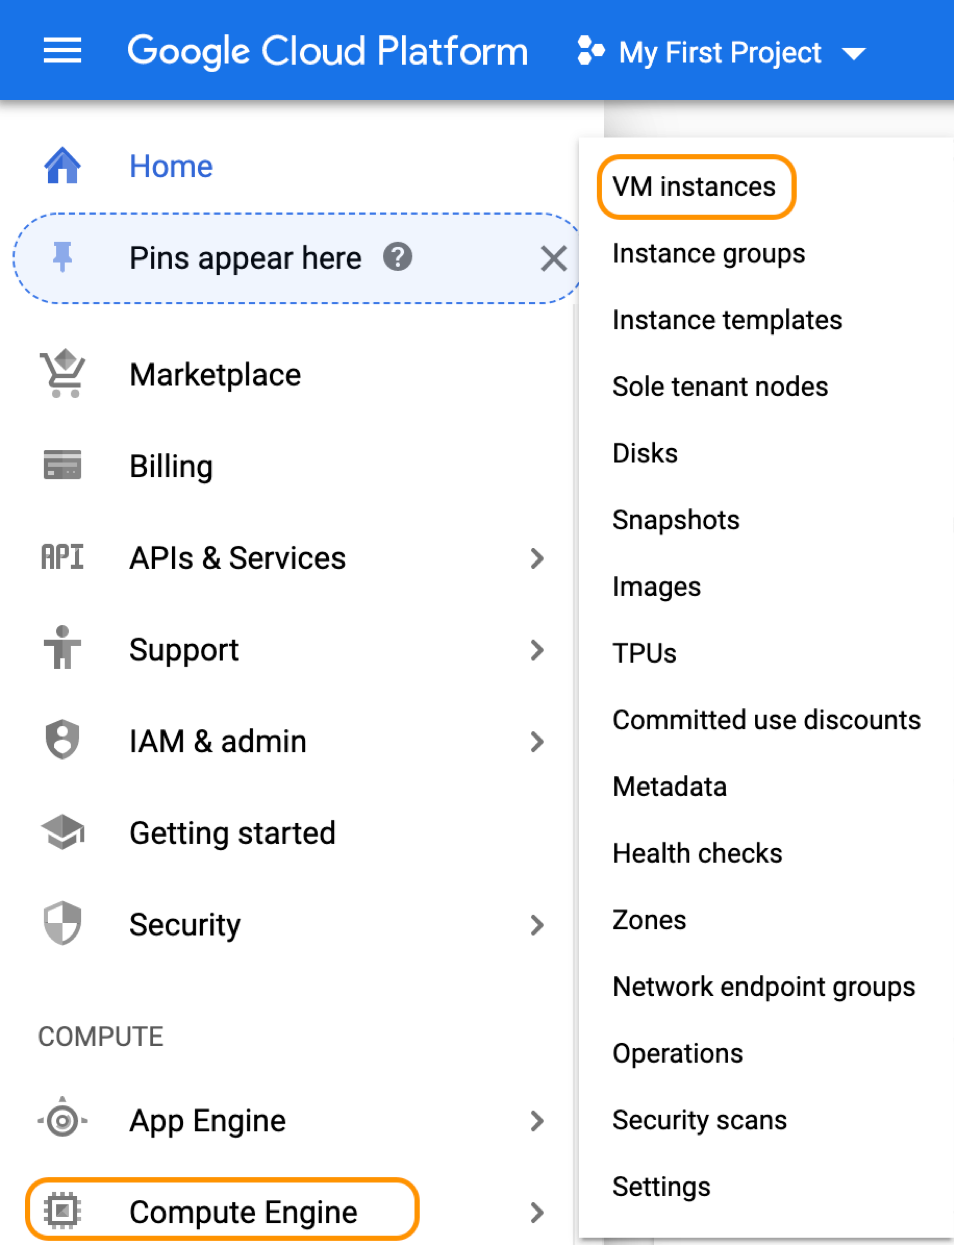
Once you’re in, the next hurdle is figuring out where to go. Once you get to your Google Cloud console, you will want to go over to the left, go to Compute Engine, and then to VM Instances. From there, go to Create Instance. This is where you’ll be creating your new VM.
First, select the region and the zone where you want the VM to run. Next, under machine configuration, you want to change the machine family to General-Purpose and the machine type to Custom. This will allow you to select the amount of RAM and CPU cores manually. Underneath memory, you want to check Extend Memory as this will allow you to choose up to 624GB of RAM. Based on the size of your environment, you will want to change around the resources accordingly.
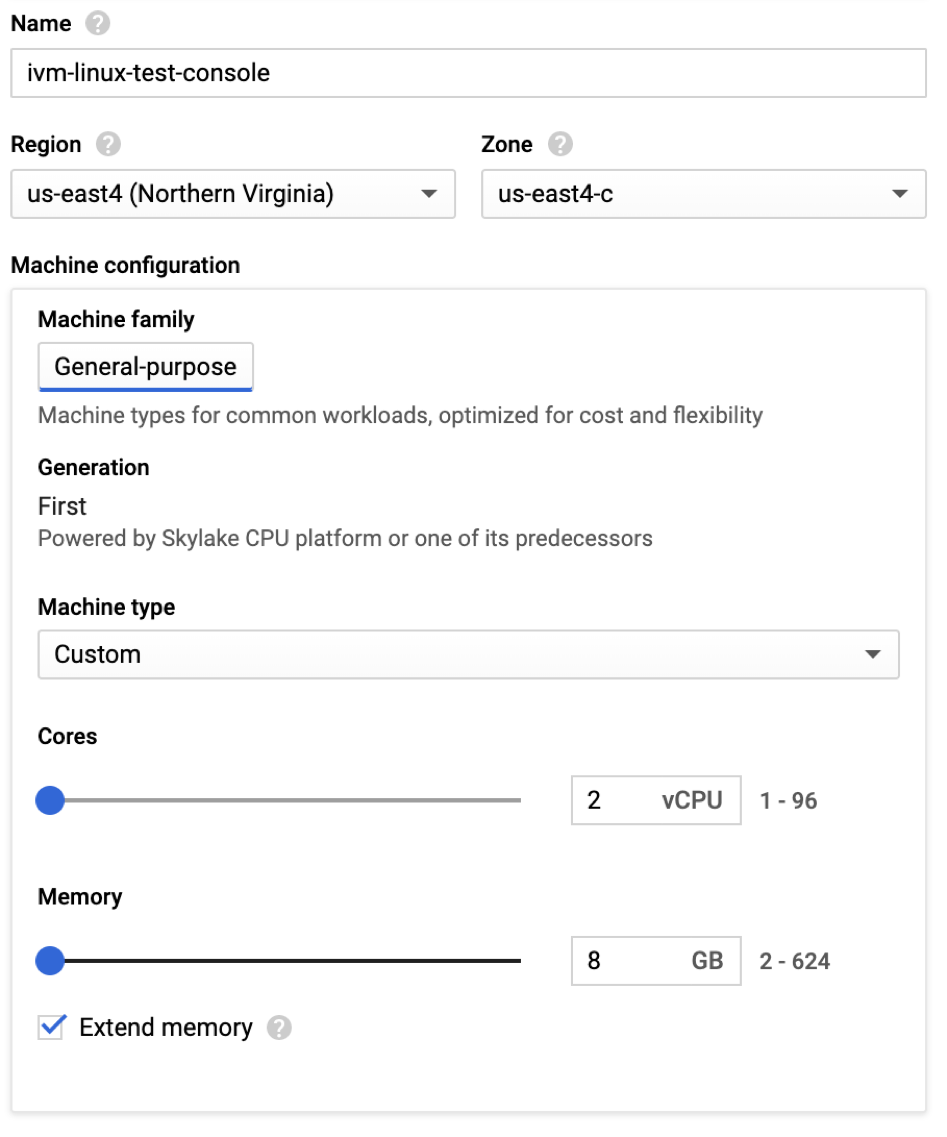
Minimum recommended specs for your InsightVM console.
Under Boot Disk, you can click Change and it will allow you to choose from a large list of OS images. Make sure you select one that is supported by InsightVM. There are a wide variety of Windows and Linux operating systems so you can pick whatever fits your environment best. Don’t forget to change the amount of storage space before choosing Select.
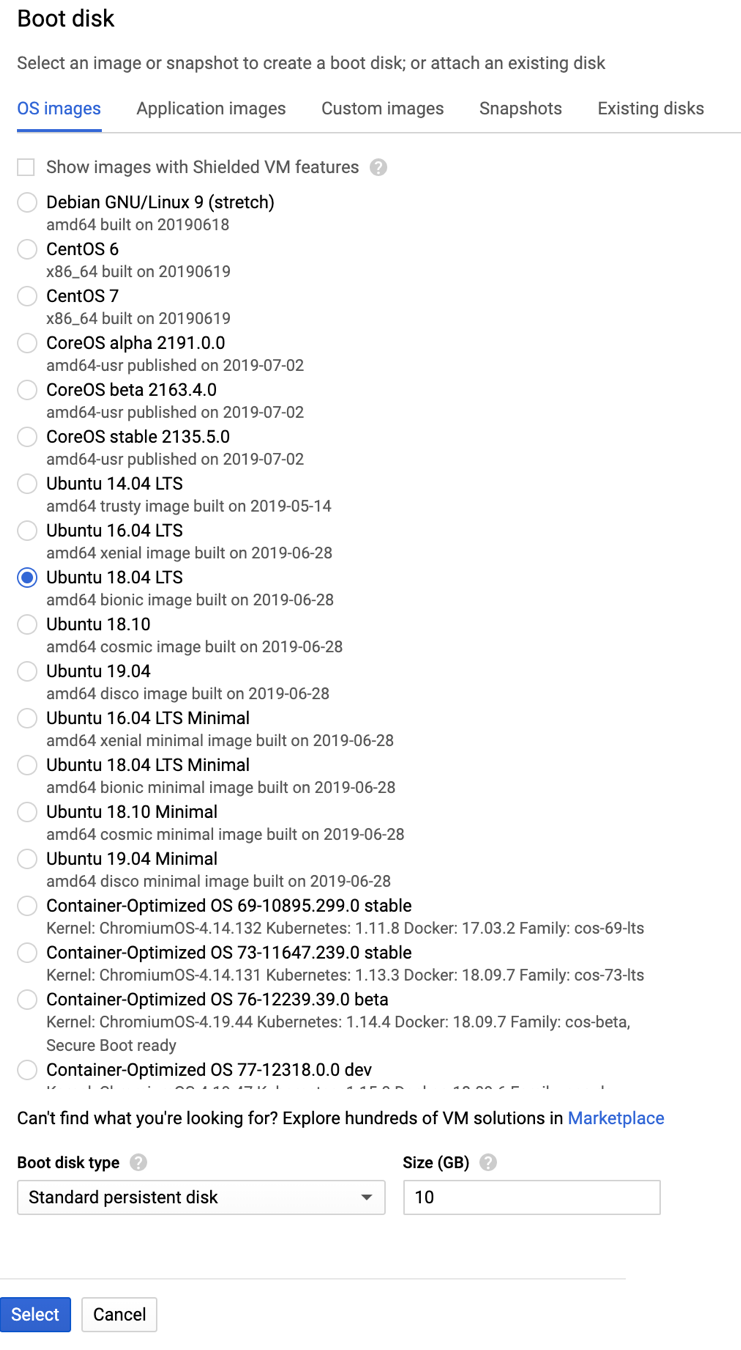
A list of the OS images you can choose from.
Before creating your VM, note that on the right side of the page, Google will give you the estimated cost of your VM on a monthly and hourly rate so you can budget accordingly.
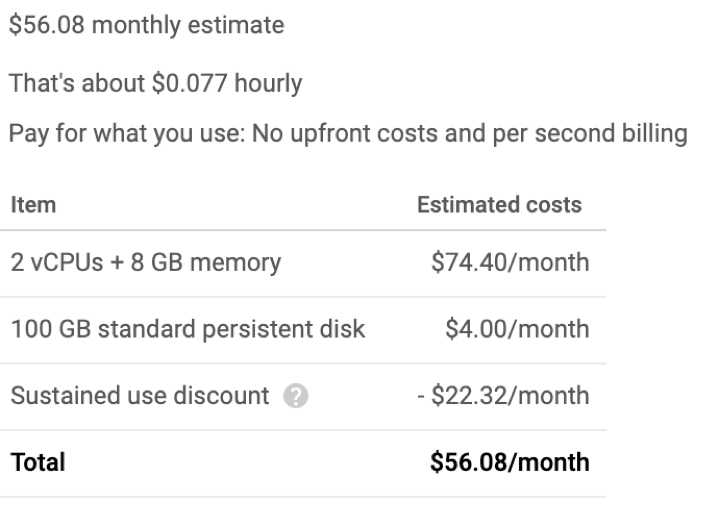
This is the cost of a VM that will store the InsightVM console using the minimum recommended specs.
Set up firewall rules
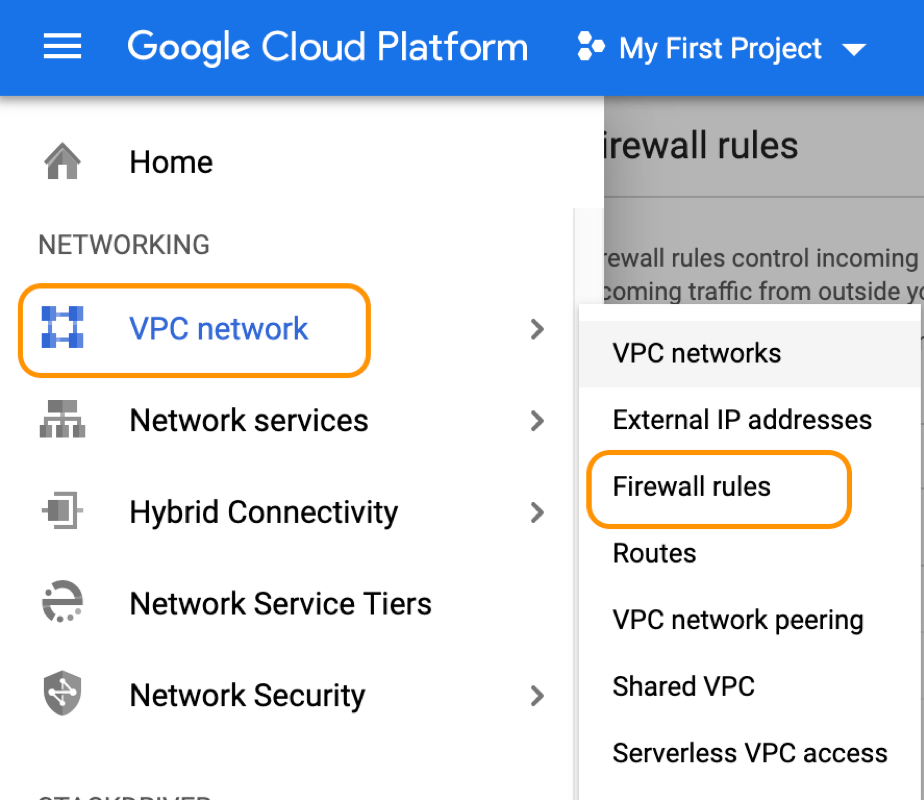
After creating your VM, you need to make sure it can reach all the resources it needs. For that, we’re going to create some firewall rules for your Google Cloud. You will need to go to the left menu under VPC Network, and then to Firewall Rules. There are a few default firewall rules, but we’re going to create one in order to access the console.
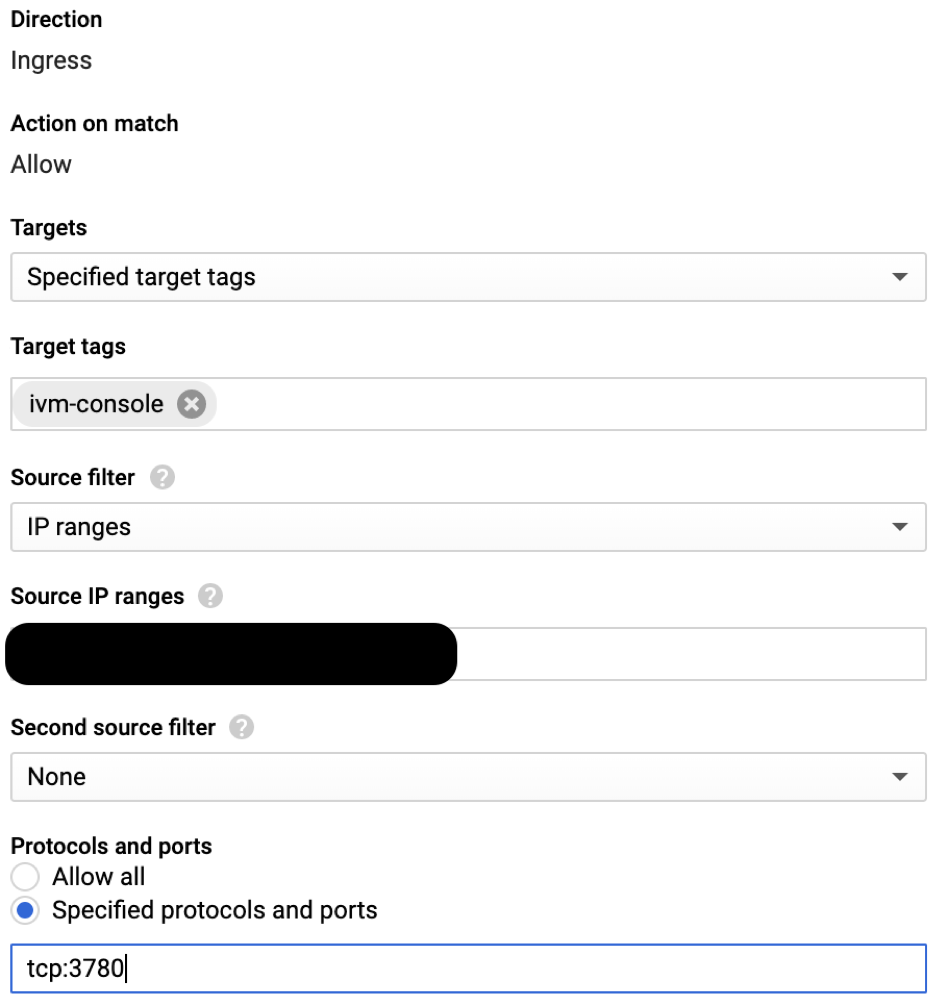
First, you want to change the Targets to Specified Target Tags. This will allow you to create a tag that will apply this firewall rule to any VM that it is applied. Next, under Source Filter, you want to add the IP ranges for any device you would want to access your console. Finally, you are going to go to Protocols and Ports, select Specified Protocols and Ports, and type in tcp:3780.
Once you save, you are going to want to add that tag you created earlier to your console VM. For that, go back to your VM Instances page, click on the name of the console VM you created, click Edit at the top of the page, and then add the tag you created under the Network Tags section. Don’t forget to save once you have it created!
Accessing the VM
After all that, you will then be ready to access the VM and install the console. If you created a Linux VM, you can click SSH underneath Connect on your VM Instances homepage. If you created a Windows VM, you can RDP to the target External IP address. In Linux, the easiest way to get the installer on the console VM is to run the command wget http://download2.rapid7.com/download/InsightVM/Rapid7Setup-Linux64.bin. From here, simply run the InsightVM installer and connect to your InsightVM console using the VM’s external IP address.

Easily connect to your Linux VMs by clicking on SSH to open a session from your browser.
Creating an engine
After creating your console VM, making additional ones for your engines is quite simple. First, open the VM Instance Details for your console VM by clicking on the name. Next, on the top of the page, click Create Similar. All your VM settings will automatically populate into the new instance. From there, you can change the number of resources, then save when you’re done.

Connecting an engine
Connecting an engine to your InsightVM instance is simple, as there is already a firewall rule in place allowing anything internal to talk to anything else internally. Just install the engine on your new VM, specify an engine to console connection, then just use the console’s internal IP address during the pairing phase.
Conclusion and final thoughts
That’s it! You should now have a working InsightVM console and engine in your Google Cloud environment. he Google documentation is fully fleshed out and very easy to follow, with direct links to the sections they are talking about. There is also a Google Cloud command line as well as an API if you wanted to manage outside the GUI. For those of you taking a look from Azure or AWS, you should feel right at home.
