Last updated at Fri, 29 Dec 2023 20:49:59 GMT
Hey! Josh Frantz here, Lead Security Consultant at Rapid7. In this blog series, we will focus on how to automate the mundane so you can more efficiently secure your AWS environment and focus on solving important, engaging, and difficult issues.
Today, we are going to be installing software on all your existing EC2 instances across several (or all!) accounts under an organization in AWS. I’ll even show you how you can create resource groups to easily use this same automation in the future for things like running scripts, updating patch levels, and more!
For the purposes of this blog, we’ll install the Rapid7 Insight Agent on all of our EC2 instances. The Insight Agent is a lightweight piece of software that runs on your endpoints and collects data for InsightVM (our vulnerability management product) and InsightIDR (our cloud-based SIEM product). It sends data to the Insight platform for processing so we can assess for vulnerabilities and provide user behavior analytics (UBA).
The same automation document can be applied to nearly any command you can run in a shell or with PowerShell, so feel free to use this for anything!
Overview
In this blog post, we’ll go over several steps to make sure that automating the installation of the Insight agent for all your existing infrastructure is easy. First, let’s talk about Systems Manager.
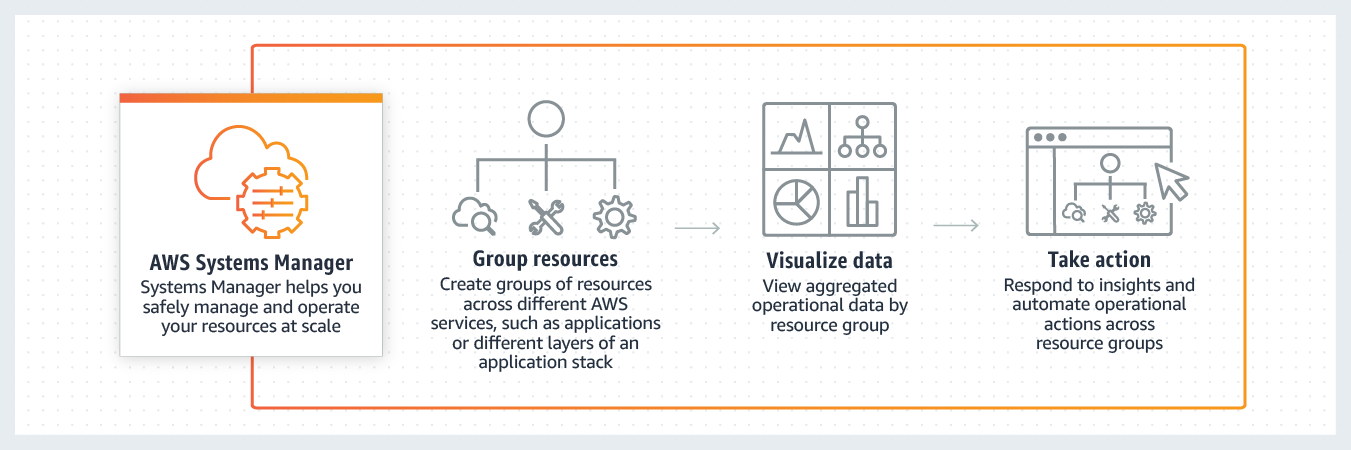
AWS Systems Manager
Systems Manager is one of the many tools at our disposal in AWS. It allows us to automatically push out massive amounts of patches, commands, and automation in general. The following are some areas SSM has proved helpful in the past:
- Using SSM in conjunction with AWS Config to automatically reconfigure EC2 instances that have fallen out of compliance, such as someone configuring an instance with port 22 open to the world.
- Delivering security patches to all of my EC2 instances according to a specific baseline with Patch Manager.
- Creating an AMI based on a patched EC2 instance for Windows or Linux.
You can read up on the documentation here, but today we’ll be using SSM Automation to execute a document (which is basically just a YAML file with settings and commands) across several accounts and regions.
Here is a basic rundown of what we will do:
- Create resource groups in Systems Manager to logically group EC2 instances by certain criteria.
- Create IAM roles required to use Systems Manager across your accounts.
- Create the document to install the agent on Linux and Windows EC2 instances.
- Execute our document to install the agent on multiple accounts, within multiple regions.
Things we’ll need
- An account with permission to:
- Create resource groups and tags
- Create IAM roles, IAM users, and IAM policies
- Create Automation Documents in SSM
- Execute run commands across accounts using STS:AssumeRole
- EC2 instances that have the SSM role for EC2
- arn:aws:iam::aws:policy/service-role/AmazonEC2RoleforSSM
Creating resource groups
To manage the organization of our EC2 instances, we’ll create resource groups. This allows us to create logical groups based on key:value pairs in AWS. To do this, we’ll navigate to AWS Systems Manager and select Resource Groups on the left-hand menu. We’ll then select Create a resource group:
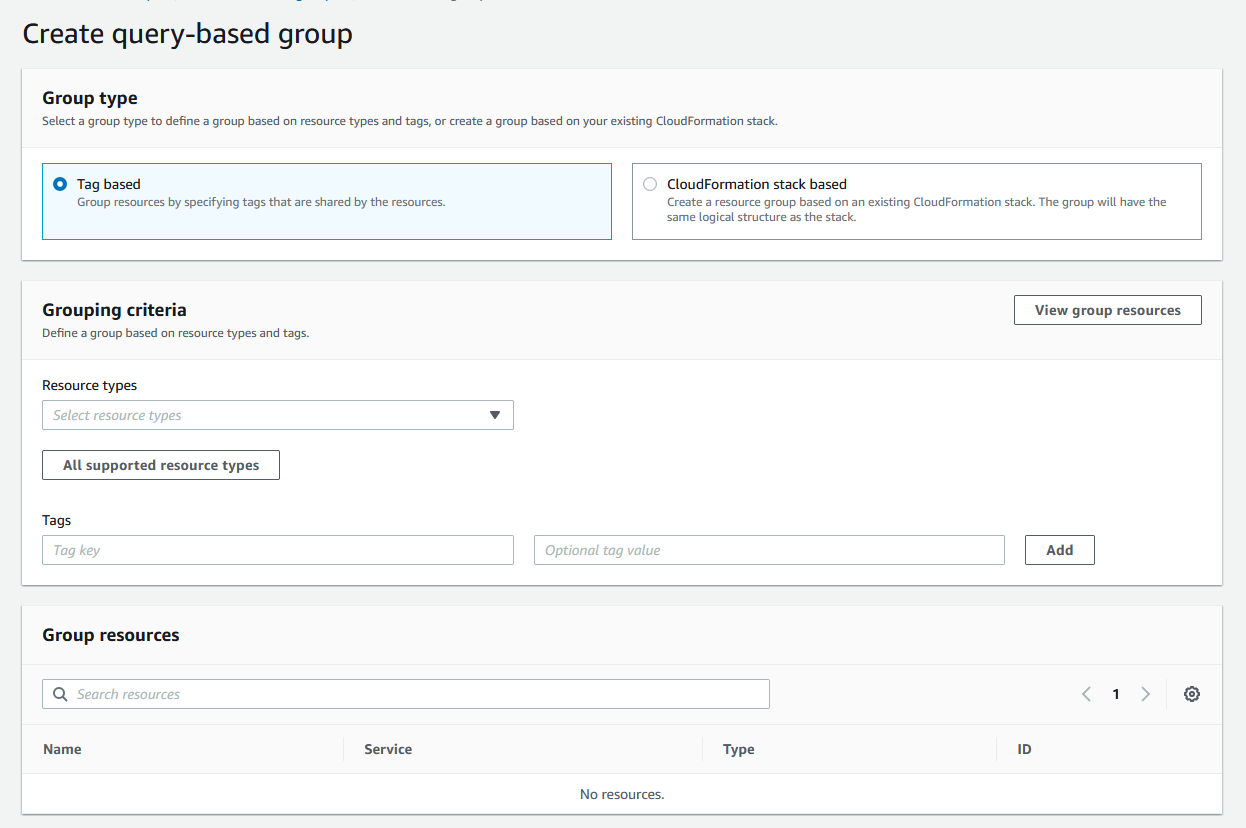
What’s really cool about resource groups is you can either use a tag-based approach, or you can actually use a CloudFormation stack if you’re already revving up your infrastructure with CloudFormation. For this example, we’ll use tags. I’m looking for the AWS::EC2::Instance resource type, and for the key:value pair SSMRun:Yes:
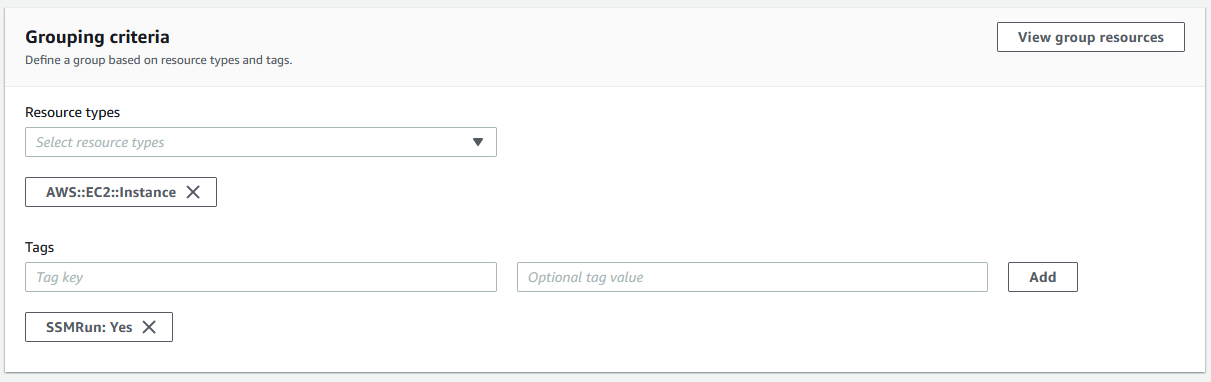
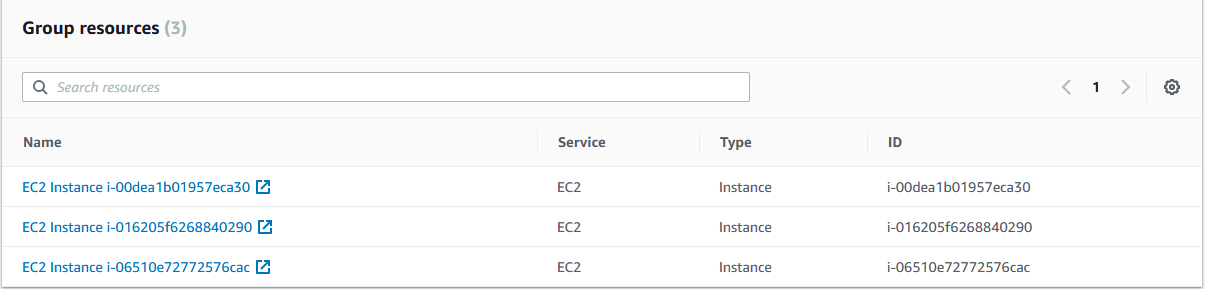
You can select multiple tags, but for this example, we’ll stick with the above. If you select the View group resources, you will see a list of all instances matching that tag:
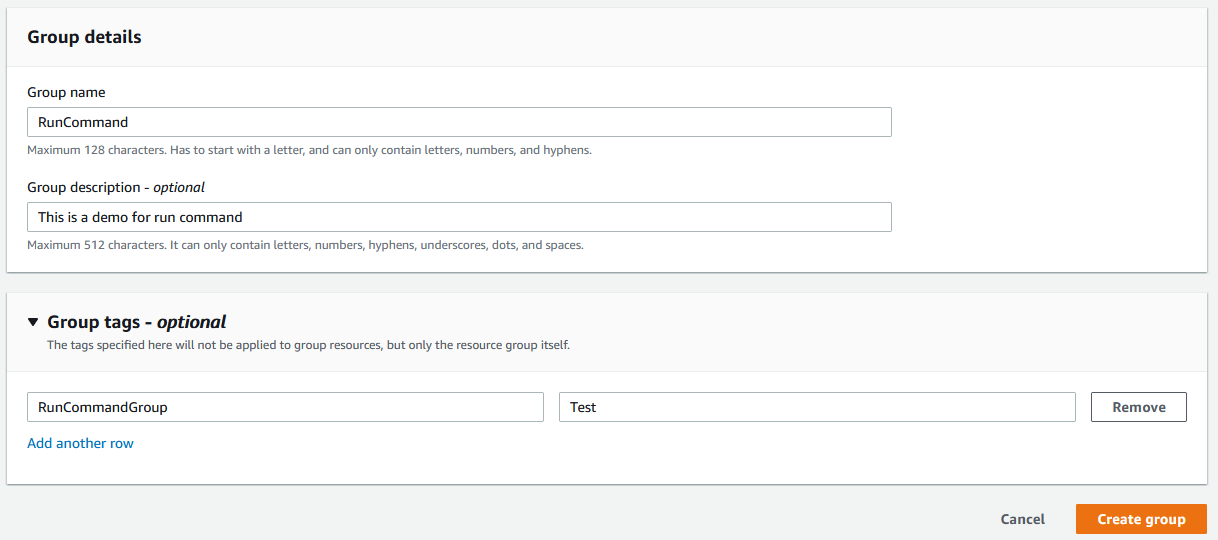
Awesome! Now we can name the group, give it a description, and tag the group (yes, I am going to tag the group full of tags because I am a tag maniac):
After creating this resource group, we now have a basis to execute commands across accounts! If you wanted to do this with one command via the AWS CLI, that’s here:
aws resource-groups create-group --name RunCommand --resource-query '{"Type":"TAG_FILTERS_1_0","Query":"{\"ResourceTypeFilters\":[\"AWS::EC2::Instance\"],\"TagFilters\":[{\"Key\":\"SSMRun\",\"Values\":[\"Yes\"]}]}"}'
IAM roles and management account and region
To use the multi-account/mult-region feature of Systems Manager, you will need to designate both a management account and a management region. These are the account and region the commands will be executed from, along with creating two roles that need to be added to each account that will be ran against. A CloudFormation template will be provided for everything here, so feel free to use that and automate everything!
Management account and region
In our designated management account, we’ll need to create an IAM role and IAM policy to attach directly to a user (referred to as an inline policy).
For our role, we’ll use the JSON document here and create our new IAM role. There is also a CloudFormation stack available here to use if you wish. This role gives our master account the ability to list all of the AWS accounts under the parent organization.
For our inline IAM policy, we’ll grab the JSON here, create a policy, then attach it to the designated master account’s user. This allows us the ability to list all of the group resources using IAM PassRole.
Target accounts
First, we’ll create another role that needs to be added to each target account. You can get the JSON from GitHub here, or use the CloudFormation stack found here. You’ll also need to replace the <ManagementAccountIDHere> with the account number of your master account. If you’re using the CloudFormation stack, it is the only input parameter available.
We’ll then create a role that allows PassRole to assume the execution role needed to run commands to install the Insight Agent. The JSON for that is here, and make sure to update the <TargetAccountID> with the account you’re creating the role under. If you want to make this easier, the CloudFormation stack is here.
Now that we have all the boring rigamarole out of the way, let’s start installing the Insight Agent!
Automation document and execution
First, what is an automation document? An automation document is a JSON or YAML file containing actions that can be executed on different resource types in AWS. Steps in this document are run sequentially and can even invoke AWS APIs. In our document, we’ll leverage the SSM API to gather the operating system on every EC2 instance we’re running against. Then, we’ll run commands to install the Insight Agent. We’ll use aws:branch within our document to run either the Linux script or PowerShell script based on detected operating system.
The next thing we’re tasked with is creating a documentation that will install the Agent. This is actually really simple: We have a single document that will work on both Windows and Linux. We kept it pretty simple for this one: We’re checking to see if the Insight Agent installation directory exists. If it doesn’t, we install the agent. Like I said, keeping it simple!
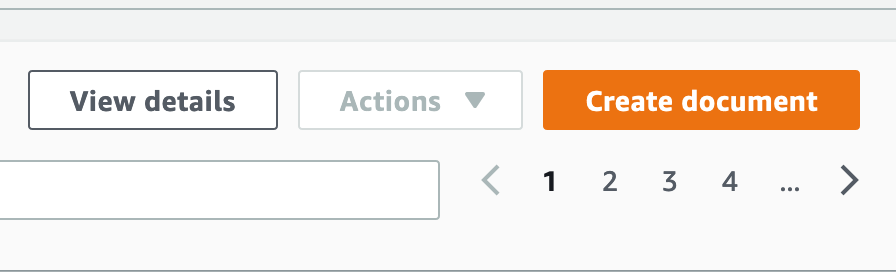
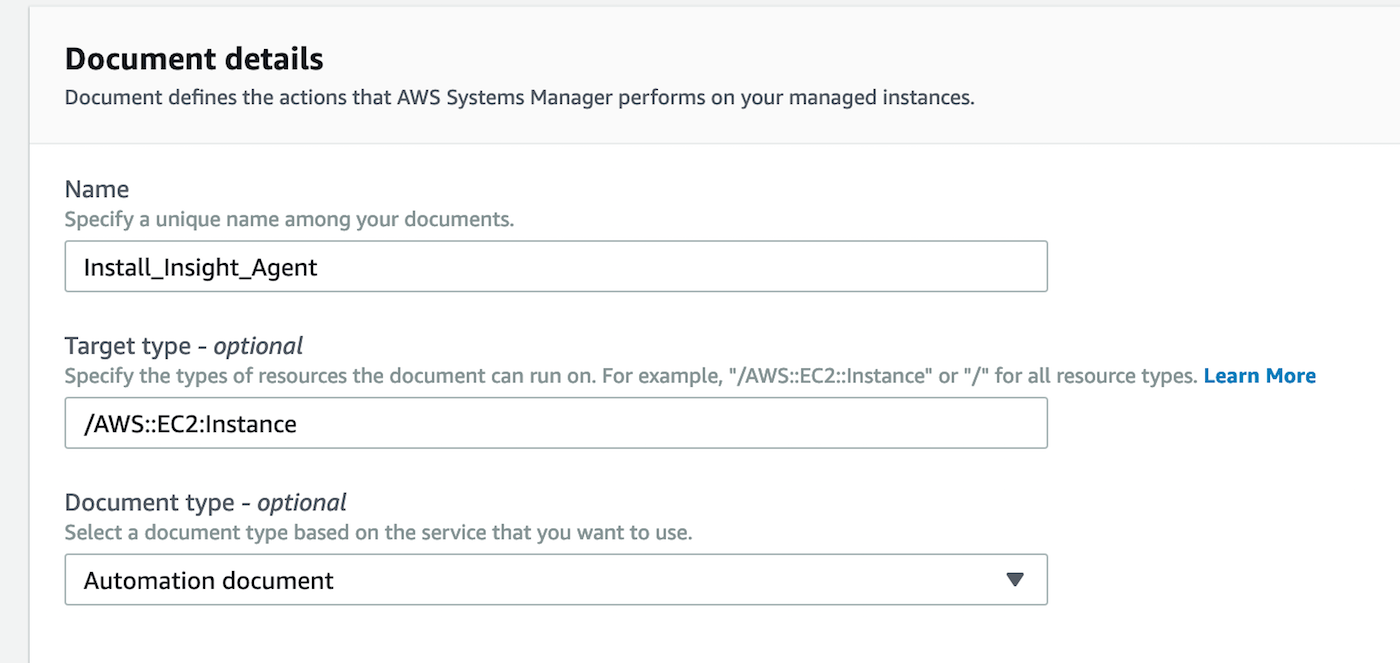
In our designated management account, go to Systems Manager within AWS and in the bottom left corner, click Documents. Once you’re at the documents page, go ahead and click Create Document:
Go ahead and give it a name, specify the resources this automation document will run against (I’m using EC2 here), and be sure to select Automation Document in the dropdown:
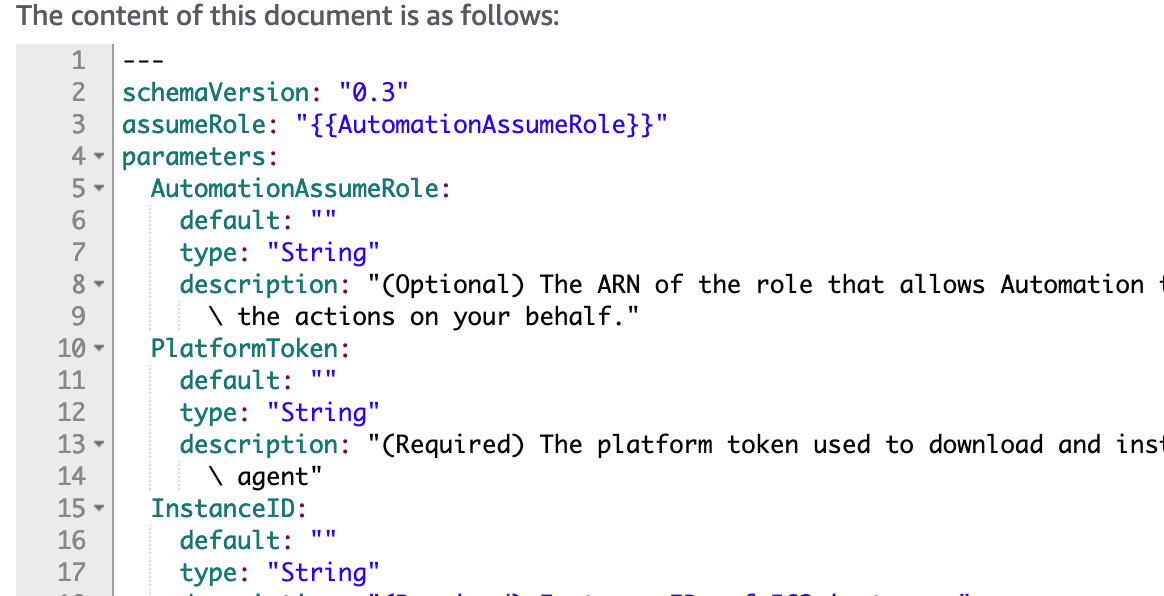
Below, grab the YAML (because it’s superior to JSON) from GitHub here and replace all the text in the box with it:
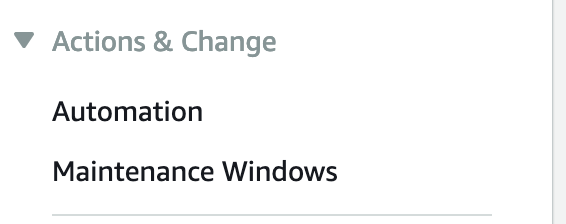
Now that we have our automation document, let’s set up the execution job. Go ahead and click Automation on the left-hand menu:
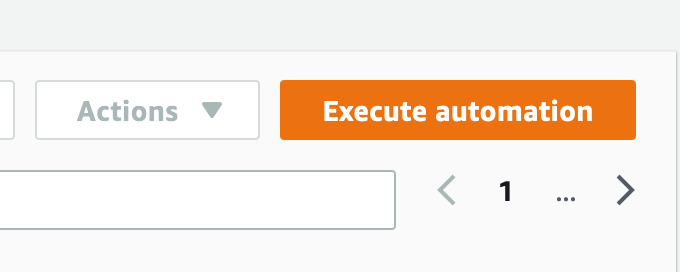
After navigating to the Automation page, click Execute Automation on the right.
Click on Owned By Me and select the document we created earlier. We’ll use the default document version, then click next. Here is where things get interesting. You’ll notice we have a few different ways to run this document:

We can run this simply with an instance ID of a single EC2 instance, we can run this against a resource group or list of tags, or entirely different accounts. For this example, we’re going to choose Multi-account and Region. We can use Account IDs or Organizational Units, as well as selecting the applicable regions:

We can even control concurrency and rate limit how many accounts we simultaneously target. We’ll keep it simple for this one and leave the settings as is.
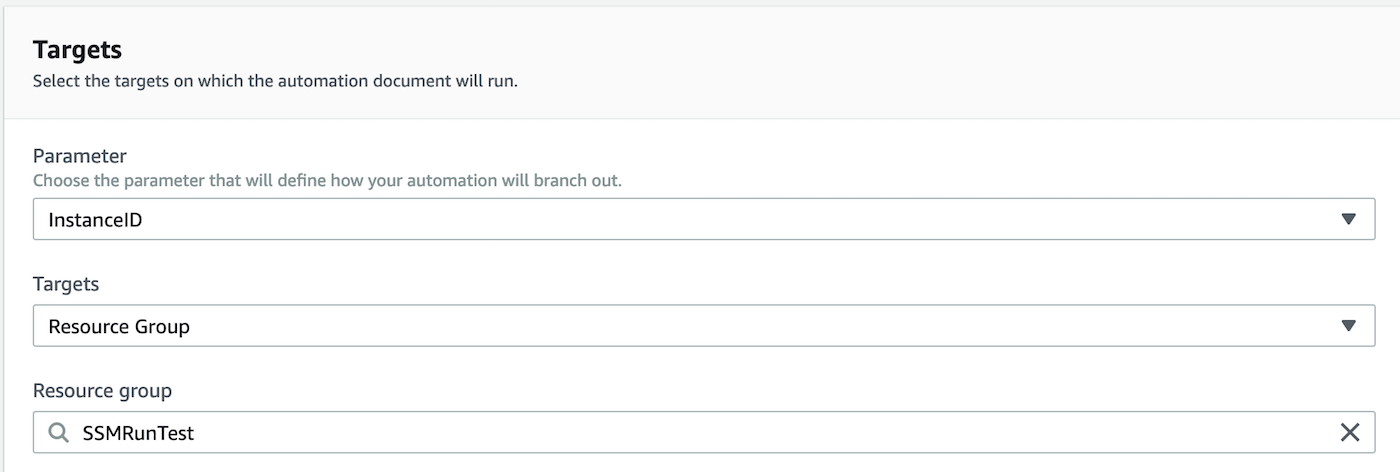
On the section, we’ll define what we look for to branch out on our run command. We’ll select the instance ID option. As for the Targets, we’ll select resource group (but feel free to use tags or even a comma-separated list of instance IDs) and then select the resource group we’re going to be running against:
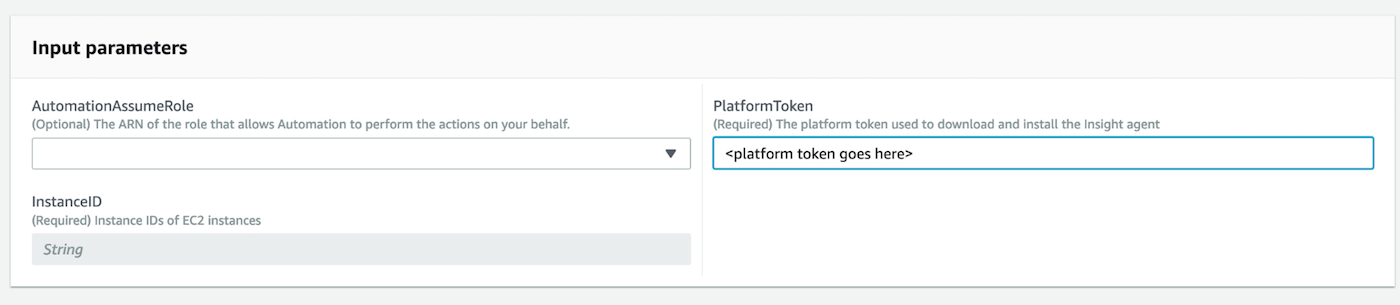
After that, the next section simply needs our Insight Agent installer token (instructions can be found here for obtaining this from the Insight Platform), so go ahead and paste that in the required field:
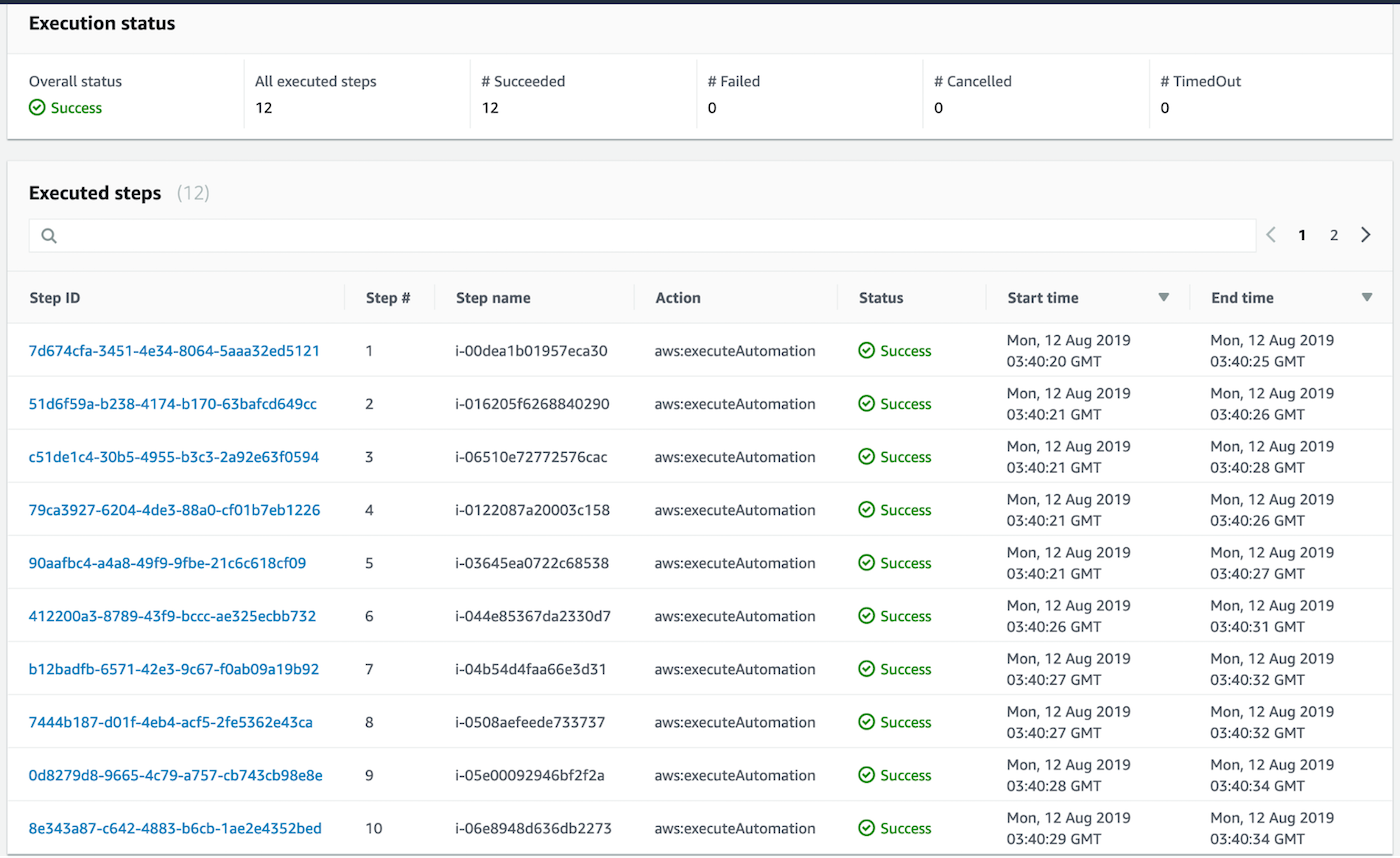
For rate control, we will leave the default settings (feel free to adjust these, though!). There is also a copy of the command at the bottom you can copy to run again if you’d like. After all that is filled out, we are ready to run our automation. As you can see, this ran successfully against all my EC2 instances across three accounts:
Fantastic! Now, the Insight Agent should be checking in on all your instances you successfully installed the agent on. You can check this by going to the Data Management page on the Insight Platform and seeing if your EC2 instances have checked in.
You’re probably wondering “Now that I’ve got all of my current EC2 instances covered, how can I ensure the agent is installed on all future instances?” This will be covered in our next blog, where we will be using Lambda, a serverless compute platform in AWS to invoke our automation document.
In this series, we will also ensure compliance is met on AWS resources using AWS Config and active rules, which includes checking whether software (like the Insight Agent) is installed and installing it if it isn't.
I really hope you enjoyed this blog! This really can be used for a wide array of things in AWS, such as patch base-lining, installing other software, and a bunch more! Are you already using SSM automation? Feel free to comment below on how you’re using it!
Want to make some improvements? Put in a pull request on GitHub and I'll get it approved ASAP! Thanks for reading!
