Last updated at Thu, 10 Aug 2023 22:18:27 GMT
Recently, we have been discussing hardware hacking for the security professional and researcher. When conducting security research on hardware, we often need to extract the firmware from the onboard flash of microcontrollers. As a primer to this, we decided to start a series in which we discuss the process of extracting firmware from different microcontrollers (MCUs). The goal of this series is to cover a number of microcontrollers that might be encountered and to introduce you to tools, software, and methods used to extract firmware or to validate that the system designer has properly secured microcontroller memory areas.
In this first part, we’ll cover the Atmel Atmega2561 microcontroller. To gain access to the firmware on Atmel microcontrollers, we will read directly from the controller over Serial Programming Interface (SPI). Accomplishing this requires the following tools and software:
Using a Bus Pirate combined with open-source software avrdude, the Atmel AVR microcontroller firmware can be extracted from the microcontroller’s flash via the SPI. The avrdude application can be downloaded here.
The standard Bus Pirate firmware should work fine unless you’re extracting the flash memory from certain Atmel microcontrollers such as ATmega 2560 and 2561. The Bus Pirate firmware can have issues extracting memory above 128K on the ATmega 2560-2561. To resolve that issue, you will need to have the STK500v2 firmware installed on the Bus Pirate. The STK500v2 firmware will turn the Bus Pirate into an AVR debugger clone. The firmware to this can be downloaded here, and the directions for upgrading the Bus Pirate firmware can be found at this website.
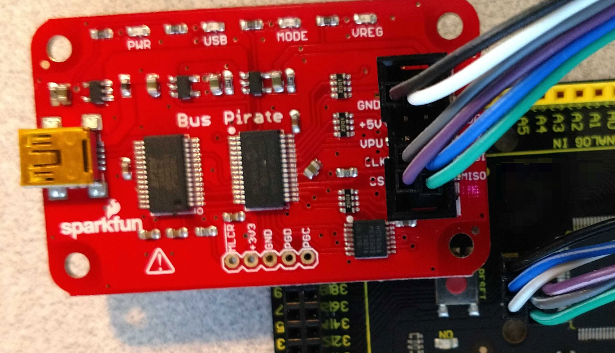
Once the Bus Pirate has been updated with the STK500v2 firmware, you can attach it to the SPI port. If you’re lucky, the device manufacturer has header connections on the board for you to attach to, but in any case, you will need to locate and validate the header connections prior to attaching the Bus Pirate—and, if needed, solder some wires or headers to the board. The other option is to connect directly to the microprocessor.
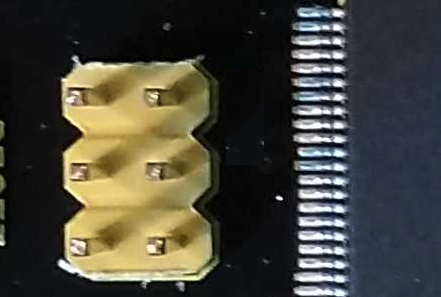
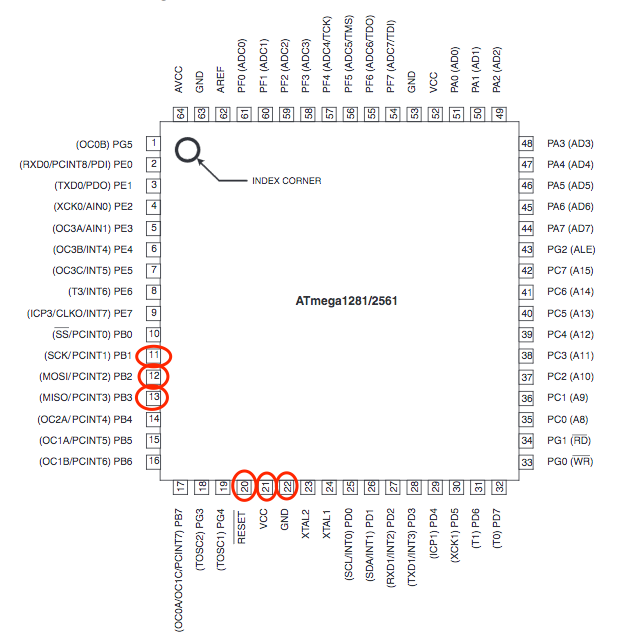
At this point, the datasheet comes in handy in identifying the pinout of the MCU. Using the Atmega2561 datasheet, you will need to identify and locate the SPI pins “Power” and “Ground.”
- MOSI = Master Out Serial In
- MISO = Master In Serial Out
- SCLM = Serial Clock
- RESET = Microcontrollers Reset
- GND = Ground
- Vcc = Voltage typically 3.3VDC
To do this, you can use a multimeter configured for continuity checking to trace out these pins to a header connection on the board or an easier location on the circuit board to solder wires that can be attached to the Bus Pirate.
Once that is completed, you can connect the Bus Pirate to the SPI ports of the chip:
| Atmega2561 | Bus Pirate |
|---|---|
| SCK pin 11 | SCLK |
| MOSI pin 12 | MOSI |
| MISO pin 13 | MISO |
| RESET pin 20 | CS |
| Vcc pin 21 | Vcc 3.3vdc |
| GND pin 22 | GCC |
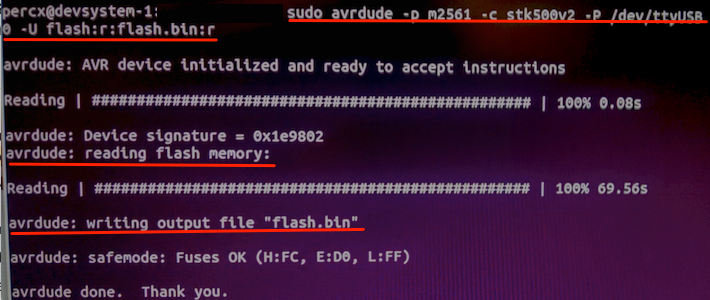
Once connected, you can then use the avrdude application to extract the flash memory from the ATmega 2561 microcontroller using the following command:
avrdude -p m2561 -c stk500v2 e -P /dev/ttyUSB0 -u flash:r:flash.bin:r
The Atmel AVR microcontroller is specified using the -p switch. The -c switch identifies the SPI interface device, -P points to the device location of the Bus Pirate—in this case, it is attached to the system as ttyUSB0—and finally, -u tells avrdude to extract the flash memory and write it to the file flash.bin.
For performance and reliability, it is recommended that this process be done from a real, physical machine running Linux, and not be attempted from a virtual machine.
So, as you can see, this process is reasonably simple once you have the correct tools, software, and datasheets for the MCU from which you’re looking to extract the firmware. Be sure to check out the other blogs in this series here:
