Last updated at Mon, 05 Feb 2024 21:02:25 GMT
As penetration testers, we often find ourselves working with applications and services that are new to us or uncommon. In one such case, I performed an internal network penetration test that was focused exclusively on a handful of Teradata database servers. To test for weak passwords, I had cobbled together a Windows batch file that would wrap username and password lists around Teradata’s bteq application. However, one thing I wanted to do was come back sometime and build a proper Metasploit login scanner module.
We’ve created an auxiliary login scanner module for Teradata, as well as an admin module that you can use to run SQL queries once you have found credentials. Both of these are now in Metasploit.
Creation and Setup
Last year, the Metasploit team added support for Python modules in Framework. You can find some more background on how to write one here.
This seemed to be the way to go for Teradata because the REST API was an optional, add-on feature, and there is a Python Teradata module that works with the downloadable ODBC drivers.
So, before you can use these modules, you will need to install the Python module:
pip install teradata
You also need to download and install the ODBC drivers. You can create a free account on Teradata’s downloads site for tools, drivers, and even a Teradata Express virtual machine you can use for testing. To get everything set up on Kali Linux, you can use the Ubuntu drivers and README here. While there is documentation for installing the ODBC drivers from the .deb file, the basic steps are:
- Install lib32stdc++6 if necessary
- Install the ODBC drivers: dpkg -i [package].deb
- Copy /opt/teradata/client/ODBC_64/odbc.ini to /root/.odbc.ini
Login Scanner
While we were working on this project, we added a Python module type for login scanners. This means that our Teradata login scanner uses our standard login scanner options, such as USERNAME, PASSWORD, USER_FILE, PASS_FILE, and USERPASS_FILE. It also means that valid credentials are written to the database.
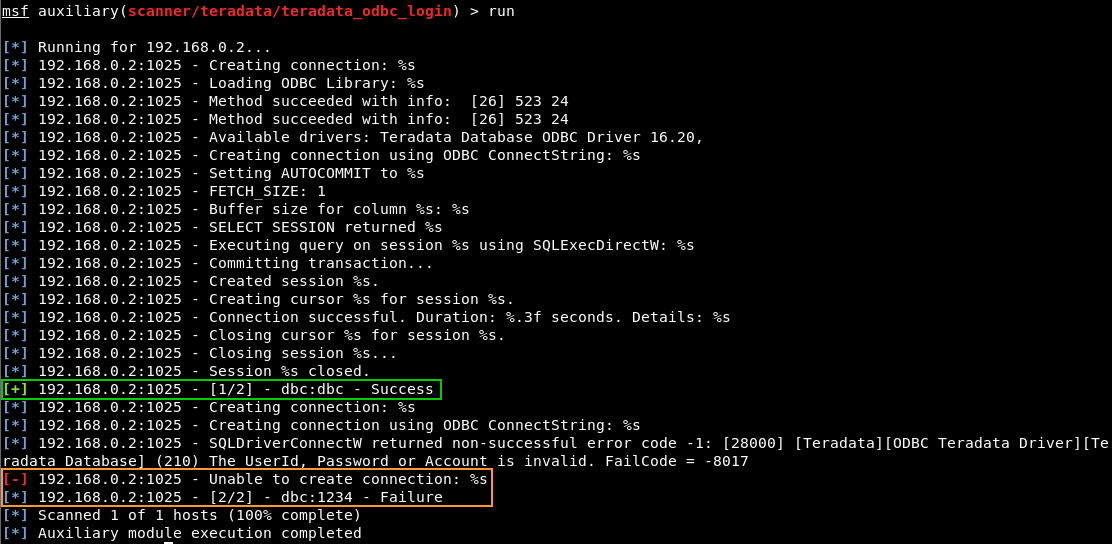
In the example below, we’ve loaded the module, set a PASS_FILE containing the default ‘dbc’ password and ‘1234’, set our target with RHOSTS, and set the USERNAME we’re guessing to the default ‘dbc’:

When we run the module as configured, we see a successful login with ‘dbc:dbc’, and a failed login with ‘dbc:1234’:

A lot of the extra output you see above is a combination of what the ODBC driver outputs and how Metasploit reads output from Python modules.
SQL Query Module
Once we’ve identified credentials, there is another module we can use to run SQL queries. The built-in ‘dbc’ credentials are the default username and password option values. In the example below, we’re using them after setting our target host:

We’ve also built in a default SQL query that will list different database names. You can leave this alone as a starting point, or set the SQL option value to the SQL query that you want to run. When we run the module as configured, we get:

The End of the Beginning
To wrap up, we’ve now got a starting point for testing Teradata databases with Metasploit. Hopefully this will be a good base to build to things like finding exploits and dropping payloads.