Last updated at Thu, 30 Nov 2017 14:54:31 GMT
Deception lures are all of the rage these days, and when deployed properly, are extremely low overhead to maintain and trigger little to no false alarms. Honeytokens, closely related to honeypots, are ‘tripwires’ that you leave on machines and data stores as early warning indications of a breach. Using AWS IAM access keys, we can create nearly limitless honeytokens for attackers to stumble upon - and it’s easy and free!
Knowing that AWS IAM access keys are of high value to targets, the idea is to leave valid (but permissionless) access keys as ‘lures’ on machines, Github repos, or anywhere really. When attackers breach a target, they will find these keys, and attempt to use them. When such a key is used, you (the defender) know that some bad stuff is happening.
Using some of AWS’s features (such as CloudWatch and Cloudtrail), I’ll show you how to build notifications when someone attempts to use these keys for any AWS API actions (which will fail), triggering the alarm.
Step 1: Create AWS IAM Credentials with no permissions
Using IAM, either via the console or API, create a user account that has no permissions and generate one or more access keys. To be extra safe, you can do this on a ‘dummy’ AWS account that is completely separate from your normal infrastructure.

To reiterate, it’s important this account has no privileges including no console privileges. It doesn’t need to! We can configure alerts on API failures, as described below.
Step 2: Setup CloudTrail & CloudWatch to notify on key usage
Now that you have your keys for your bogus account, it’s time to set up notifications in AWS when those keys are used. We'll use the builtin capabilities of CloudTrail (Amazon's audit trail logging system) and CloudWatch (its built-in monitoring/alert system) to accomplish this.
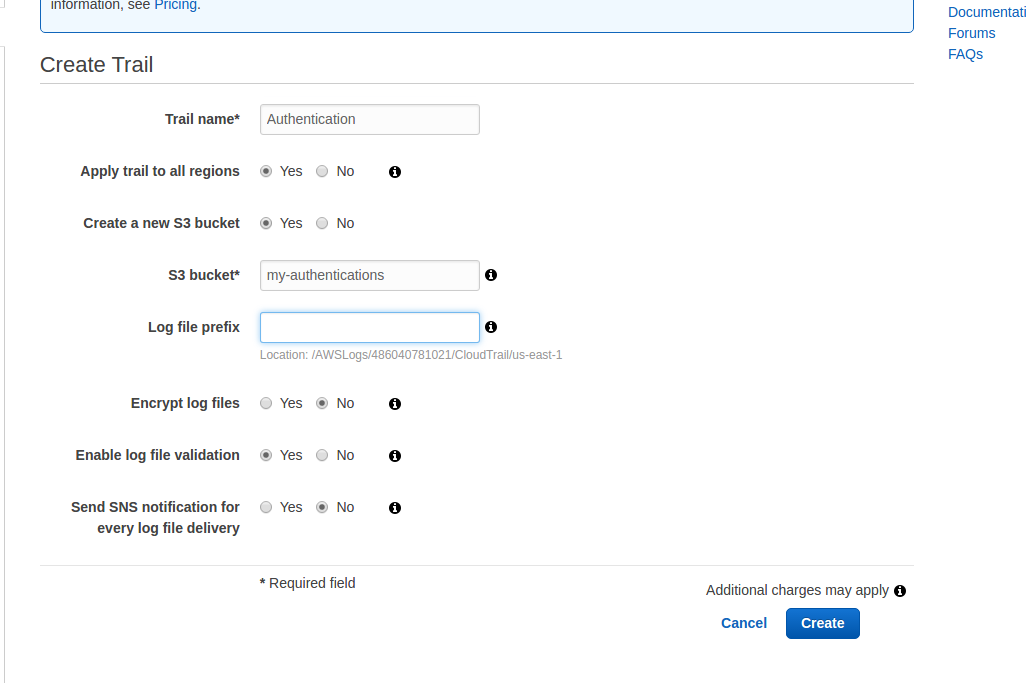
First things first: You need to record API events using CloudTrail. Nothing special here, the UI will configure it for you:
Once you have this configured, go to ‘Configuration’ for the trail to configure CloudWatch logs:
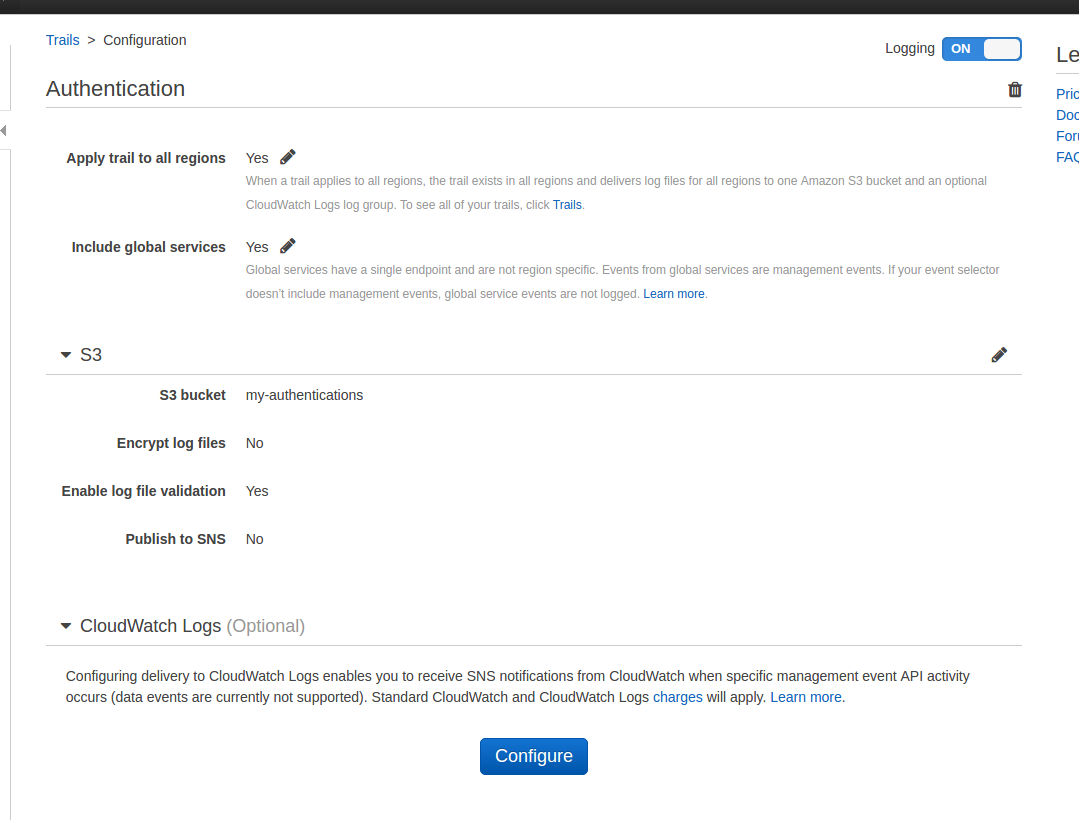
Click on ‘Configure’ and save to a new or existing Log Group.
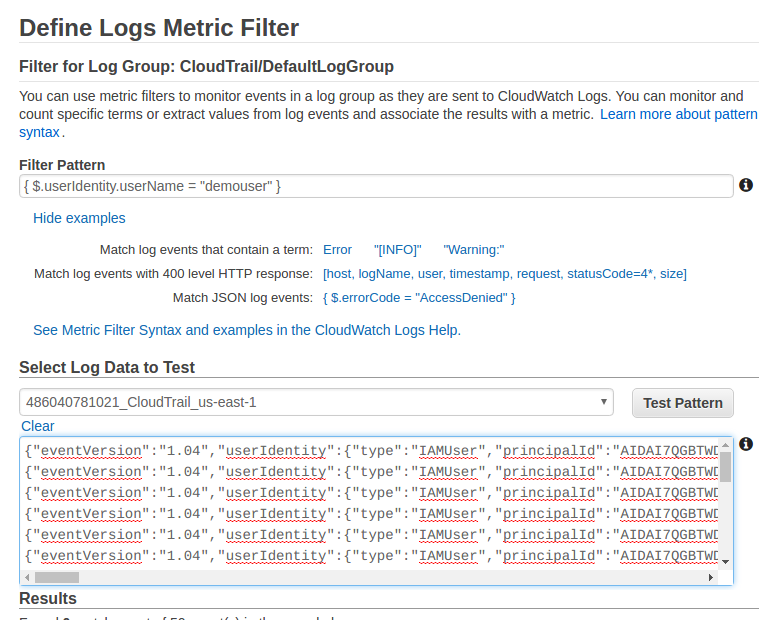
Now go to the CloudWatch > Logs panel where you must create a Metric filter.

The most important part is creating a Filter Pattern that matches your dummy username (or your accessKeyId).
For example, this matches an access key of “FOO”:
{ $.userIdentity.accessKeyId = "FOO" }
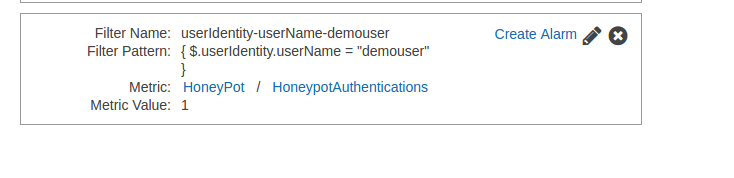
While this one matches the userName of “demouser”, our dummy user:
{ $.userIdentity.userName = "demouser" }
Depending on the granularity of alerting, you might want to do one or the other (with access keys being far more granular). For now, let’s just alert on the username:
… And save your metric in an appropriate namespace and metric name.
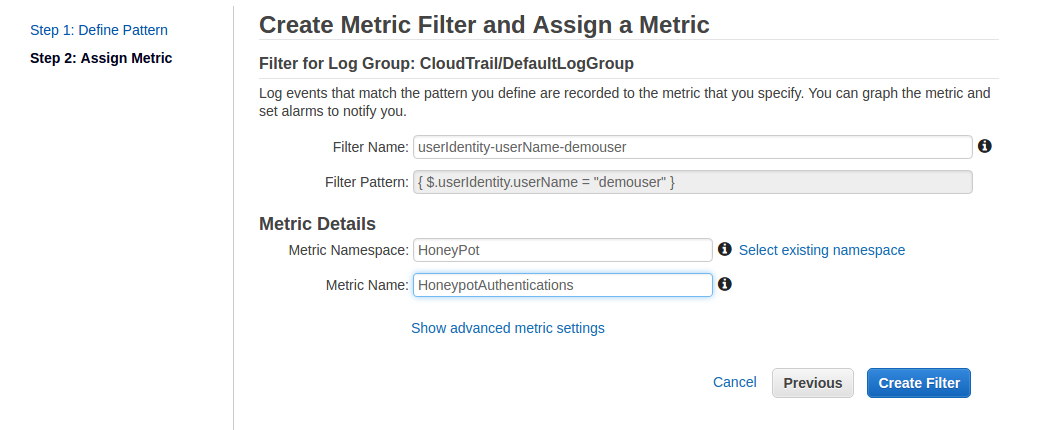
Above I’ve created a metric called ‘HoneypotAuthentications’ that matches whenever someone attempts to use the Access keys for demouser.
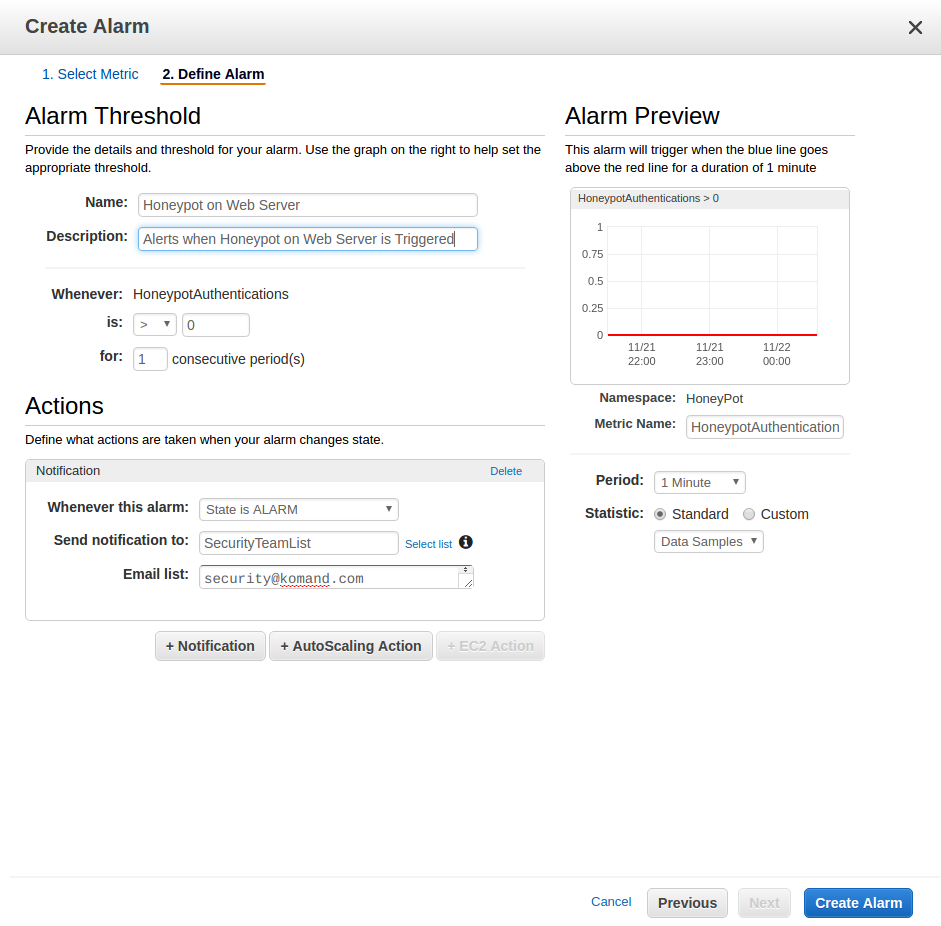
Almost done! The final step is to setup the notification alarms!
In CloudWatch > Alarms, click ‘Create Alarm’ to create an alarm. Alternatively: you can also go to CloudWatch > Logs > and click on the filters in the Metric Filters column, where you’ll see a ‘Create Alarm’ link for your metric filter:
… And then configure your alarm. They key points is you want this to trigger when 1 or more events happens within a 1 minute period. That’s it. This should never trigger except in cases of Really Bad Stuff, so it should be a quiet alarm unless things go bad!
This alarm sends an email to the security team, but you can also configure it to go to SNS:
Step 3: Place your lures
Now you have your bogus keys, you should place them in locations an attacker is likely to look. For example:
- On servers in a text file in
~/.aws/credentials(where a lot of tooling saves AWS credentials) - On your developer laptop in the same locations
- In application or systemd environment variable configuration files
- In files named ’credentials’ or in application configuration files in private, sensitive Github repos
Be creative!
For maximum attribution value, you should be generating a key-pair per location, just so you can easily triangulate where the compromise happened and be able to respond more effectively.
Extra Credit: Automate & Take Action
Currently, AWS supports native notifications via SNS and email. But what if you want to use another notification such as Slack, PagerDuty, a ticketing system, or kick off some automated response process?
Using Komand, it’s very easy to create such a workflow with a few minutes. Check out this simple workflow that monitors for an alarm message coming to a security mailbox, then notifies the security team and kicks off a server quarantine in AWS:
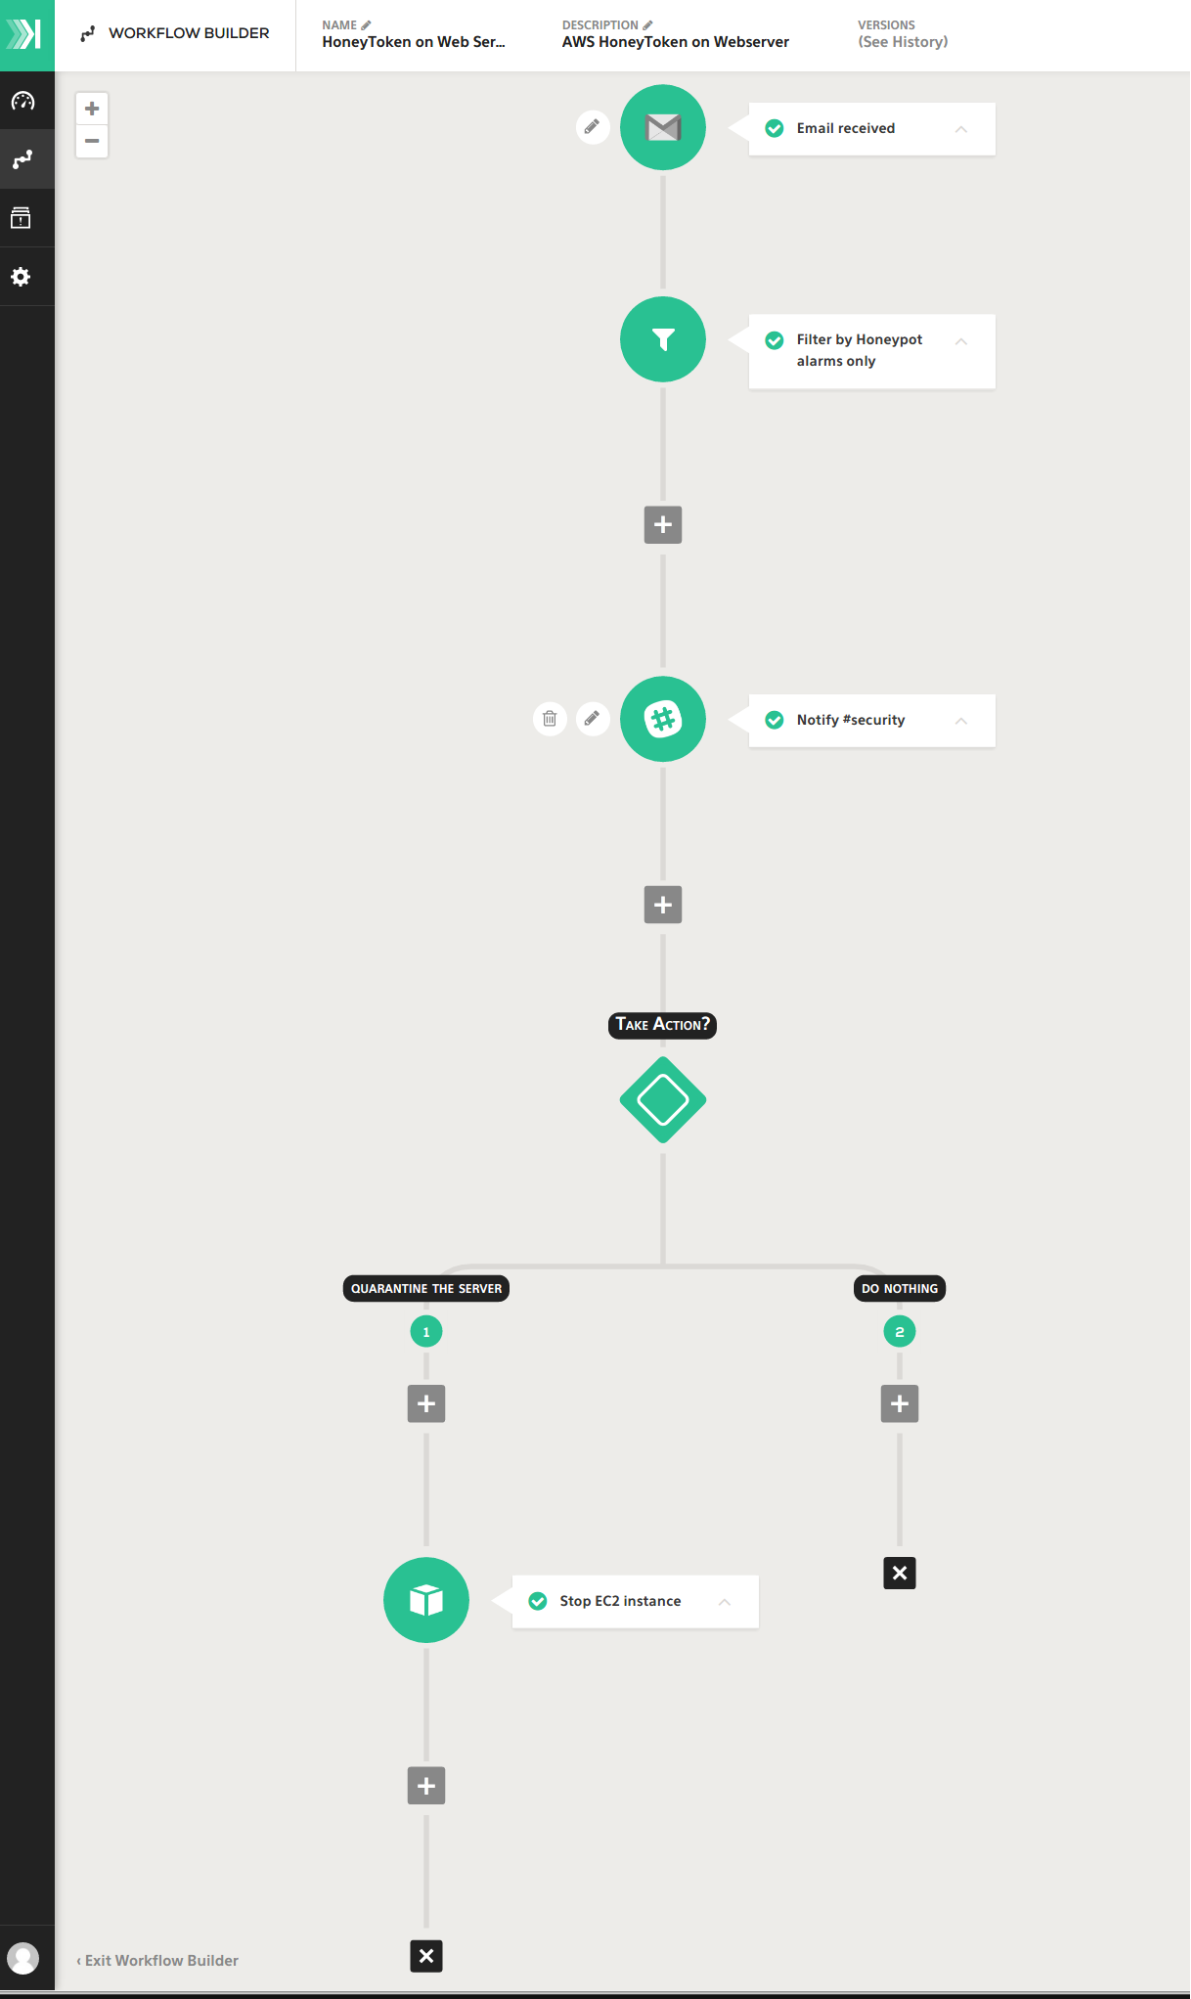
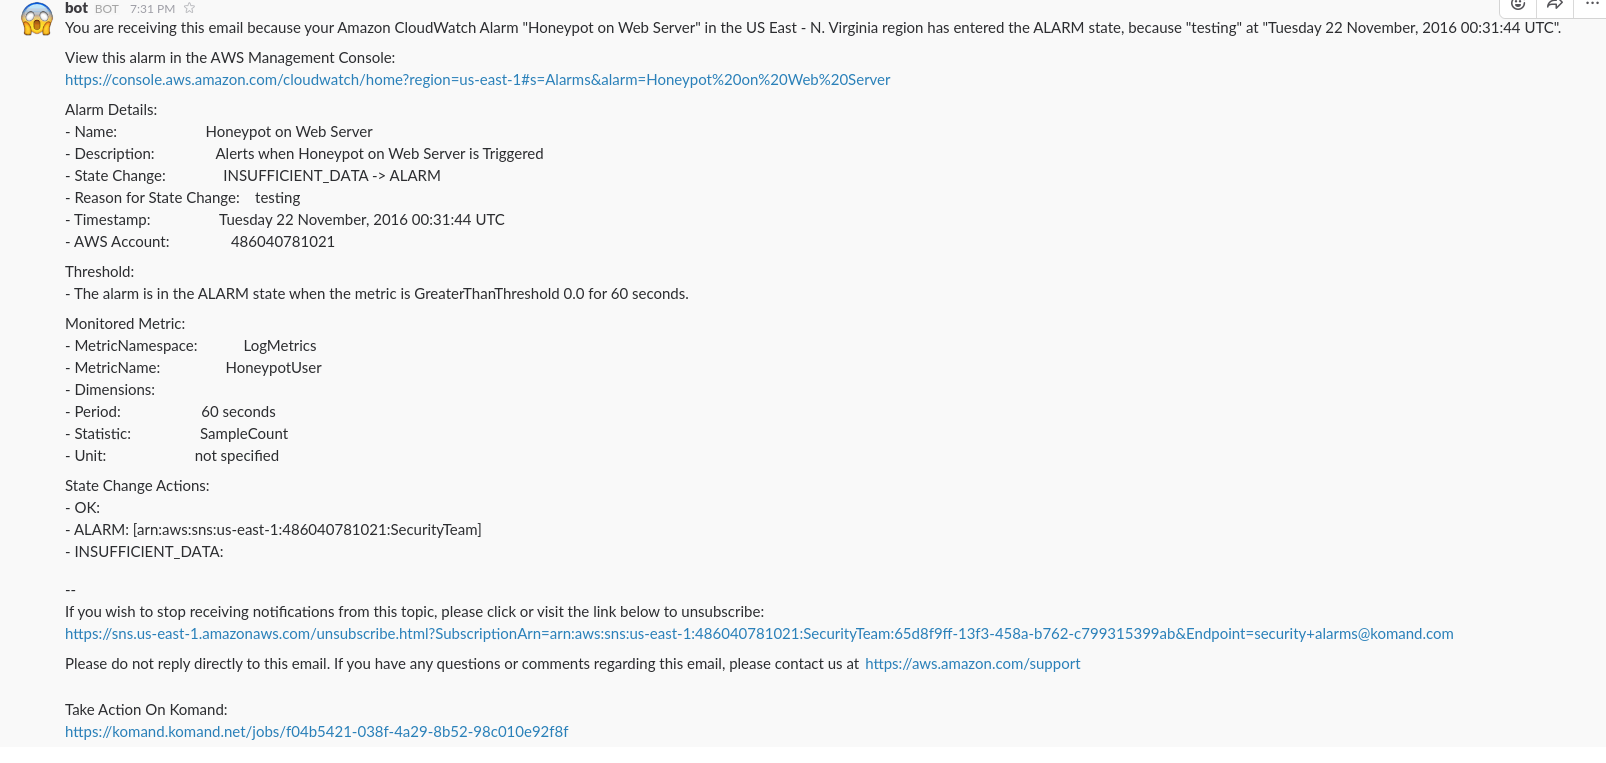
When I use my bogus keys against an AWS API (E.g. ec2 list instances), I now get the following notification via email & Slack - and a link back to Komand, where if I want to, I can take action to take that server temporarily offline for investigation, trigger some more intensive monitoring, or run some queries against my log archive to try to gather more information about the attack in progress.
That’s all folks! For some other cool ideas around honeytokens, please see our friends at https://canary.tools who offer great, easy-to-use honeypots and a free honeytokens project.
