Last updated at Wed, 13 Dec 2017 16:41:18 GMT
Synopsis
Last time, we discussed how to install the Open Vulnerability Assessment System (OpenVAS), on Debian GNU/Linux. OpenVAS is a Free/Libre software product that can be used to audit the security of an internal corporate network and find vulnerabilities in a free and automated fashion. Now that we have access to the Greenbone Security Assistant web application, the tool that will allow us to manage and configure OpenVAS, we are going to discuss how to actually configure scans using the GSA, and how to review the results of your scans once they are finished.
Configuring a Scan
If you followed our last post about OpenVAS, you should find that the OpenVAS Greenbone Security Assistant (GSA) web application is exposed on your Debian server on port 443. In order to access it, you should browse to the IP address in your browser, making sure to put “https://” before the IP address. The home page of the GSA will look like this:
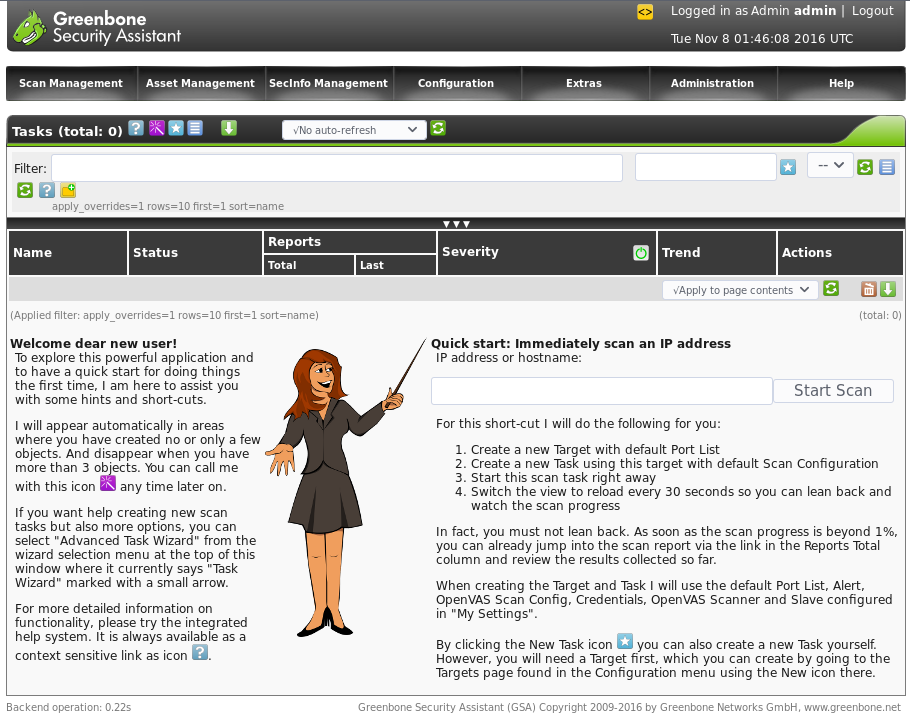 the Greenbone Security Assistant (GSA) homepage.
The Greenbone Security Assistant interface is well-known for being hard to use and unintuitive. For example, any time you want to add a “new” object, such as a scan configuration, or host list, you should look for the star icon:

the "New Task" icon is represented by a star.
If you only have one IP address, you can use the quick start to immediately start up a scan for that IP address, as shown in the bottom right hand corner of the home page. But more often than not, enterprise IT admins have a list of subnets in use by their organization that need auditing.
Adding a list of scan targets
To configure a list of hosts instead of just one, navigate to the “Configuration” tab in the site header, then select Configuration -> Targets. This will take you to the Targets page where you can configure scan targets. To add a new list of subnets, hit the star icon in the top header of the Targets page. Note that there are multiple star icons. If you hit the star icon on the right hand side of the page, that will create a new filter, instead of a new list of subnets. (Yes, the UI is clunky. But the tool is free and open source!) This will open a new page that will allow you to add a new scan configuration, like so:
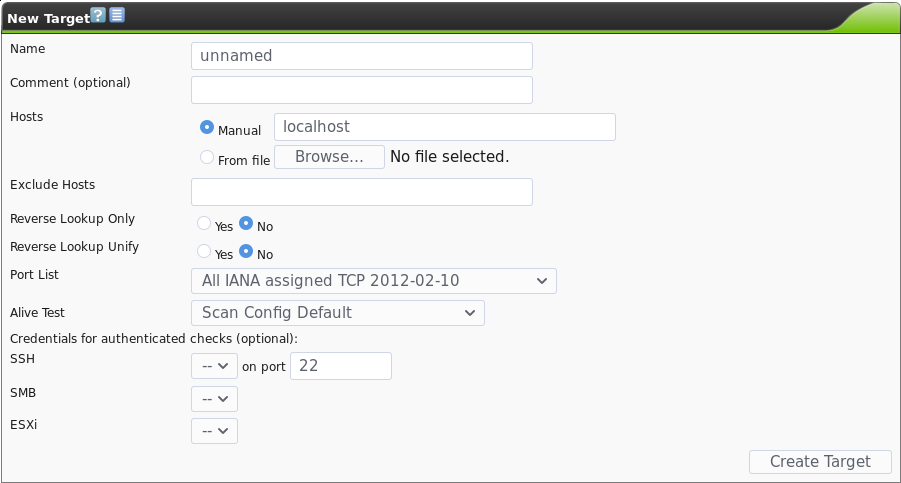 the new scan target dialog in the GSA.
This will allow you to upload a comma-separated file consisting of your target subnets in CIDR notation (note that for /32 you should just put the plain IP address, as GSA will throw an error). For example you could upload a file that looked like this:
10.1.88.0/24, 192.168.1.0/24, 192.168.2.225, 192.168.2.230-238, 192.168.2.240/30
You should see that you can also add credentialed scans for certain protocols such as SMB (ubiquitous in MS Windows networks) and SSH (ubiquitous in Unix based networks) and VMWare ESXi. You can also customize the list of port numbers that OpenVAS scans.
Changing the List of Ports to Scan
To add a new custom list of ports that OpenVAS will scan, navigate to the “Port Lists” page by going to Configuration -> Port Lists. Then hit the star icon to create a new port list. This will show you the following dialogue:
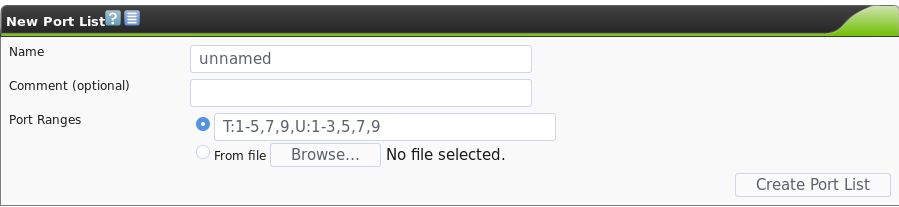 the “New Port List” dialogue, which lets you customize the list of ports to be scanned.
Customizing the list of ports to be scanned can be very useful. For instance, you could use the Nmap tool’s top-ports option to gather a list of ports by popularity, and then only scan those ports, drastically reducing the total time required to perform a scan. For instance, the creator of Nmap, Fyodor, has done studies of the most common ports on the internet and found that scanning just the top 10 most common TCP ports is 48% likely to find all of the open TCP ports on a particular host. Scanning just the top 1000 TCP ports is 93% likely to cover all of the needed open ports. (Source) For example, you could use nmap to generate an XML output listing the most common ports, which you would then have to slightly modify to import into OpenVAS:
nmap -oX - --top-ports 1000 x
Adding Credentials for Credentialed Scans
One way to increase the depth and penetration of OpenVAS’s scanning is to inform OpenVAS with a set of user credentials. This allows OpenVAS to gain better insight into open services and potentially find more vulnerabilities that are only findable by credentialed users. You can also use this to check if default credentials are set on any of your hosts, by putting in credentials that you would expect not to work, and then checking the OpenVAS report to confirm if the credentials were found to work correctly. The Hydra tool should generally be used if your intent is to check more than just a few sets of default or undesirable credentials.
To add credentials to OpenVAS, navigate to Configuration -> Credentials. You can then add a set of credentials by hitting the star icon. The add credential page will look like this:
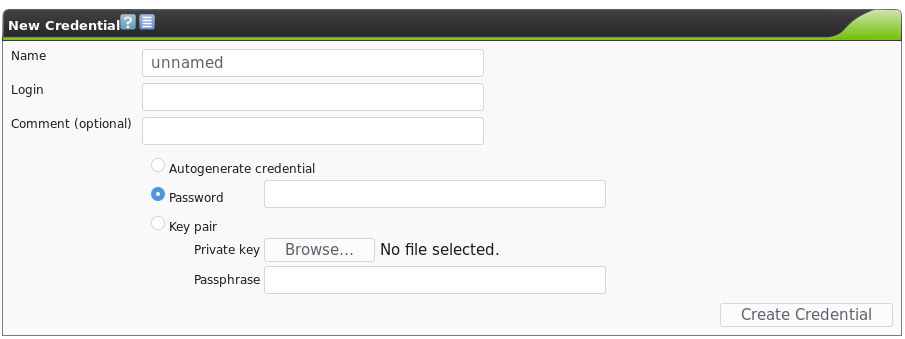 the new credentials dialogue.
Then, you can select these credentials when setting up a new scan target, as discussed earlier.
Scheduling Scans to Run Overnight
The Greenbone Security Assistant gives you the ability to schedule scans to run at a specific time, as well as the ability to repeat scheduled scans at a daily or weekly interval. To access this, navigate to Configuration -> Schedules. Then as usual, click on the star icon, and you will see the following dialogue:
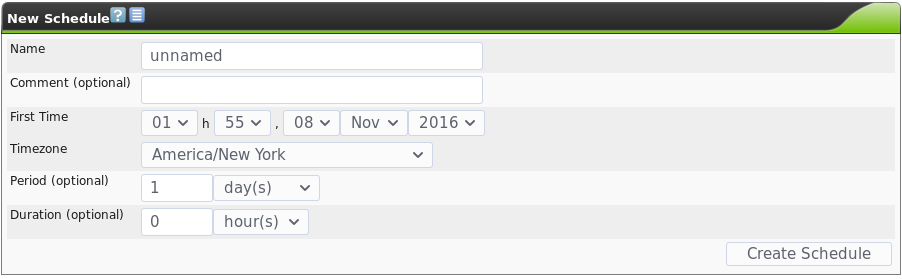 the new schedule dialogue, to schedule a given scan to run at a particular time or interval
In order to schedule a one-time scan for some time in the future, simply schedule when you want the scan to start, optionally schedule a duration to stop it in case you don’t want it to run after a certain time, and set the period to zero, to only run it once. If you want to run a scan regularly, you can set the period to something else.
Changing the Network Vulnerability Tests (NVTs) that are Run
Optionally, you can also configure which Network Vulnerability Tests (NVTs) are tested against your hosts. You may want to do this to test for specific vulnerabilities only, such as heartbleed or shellshock, and you aren’t interested in testing for anything else. You can find this under Configuration -> Scan Configs. This screen lists the current scan configurations. You can create a new one using the star icon as usual.
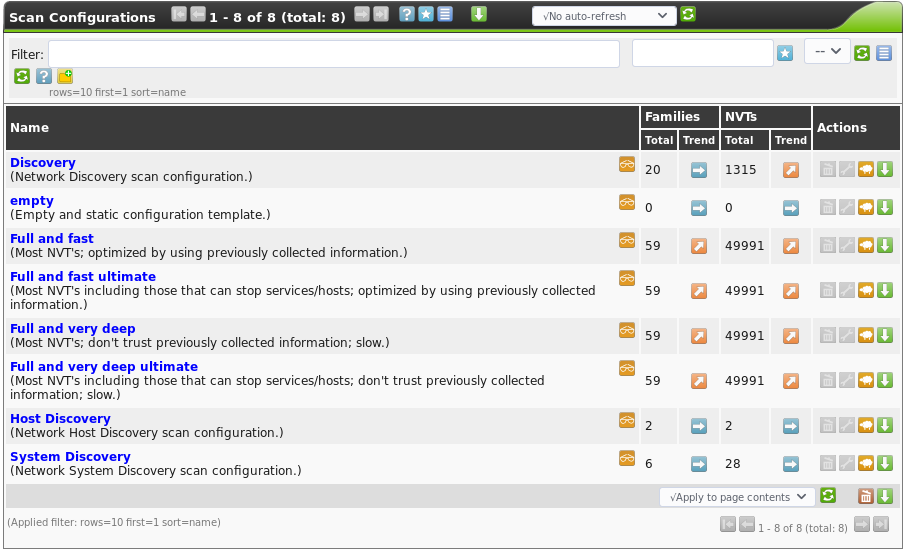 The scan config page
Its important to note, that in most cases you will want to run one of the default scan configurations and not create your own, unless you have the time and desire to comb through the thousands of NVT files and pick which ones you want to run by hand. In this case, you should probably run either the “Full and Fast” or the “Full and Fast Ultimate” scan. Fast scans are preferable both because they are fast, but also because they are intelligent: the slow scan will throw every NVT at every open port, regardless of whether it is applicable – testing shellshock exploits on a Windows SMB port doesn’t make sense, and is a waste of time, yet the slow scans would do that. The difference between the ultimate and non-ultimate scan is that the Ultimate scan contains NVTs that could cause a system crash or denial of service in the victim machines should any machine be vulnerable, whereas the non-ultimate scans generally try to avoid that. Striking a balance between better coverage and potential compromise of system uptime is a decision that you will have to make case-by-case.
Using Alerts
An additional feature from the GSA is the ability to configure alerts, available under Configuration -> Alerts. When the status of a task run changes, you can have the GSA send you an alert. This includes options such as emailing a certain email address, copying report files to a server using SCP, making a GET request to a certain server, writing out to the system log on the host machine, and other options. This may be useful as an alternative to simply kicking off a scan and coming back to the scan a number of hours later with the hope that it finished.
Creating a New Scan Task
After customizing all of the necessary various factors related to your scan, you can finally create a scan task to actually run a scan. To do this, navigate to the tasks page under Scan Management -> Tasks. Then as always hit the star icon to create a new task.
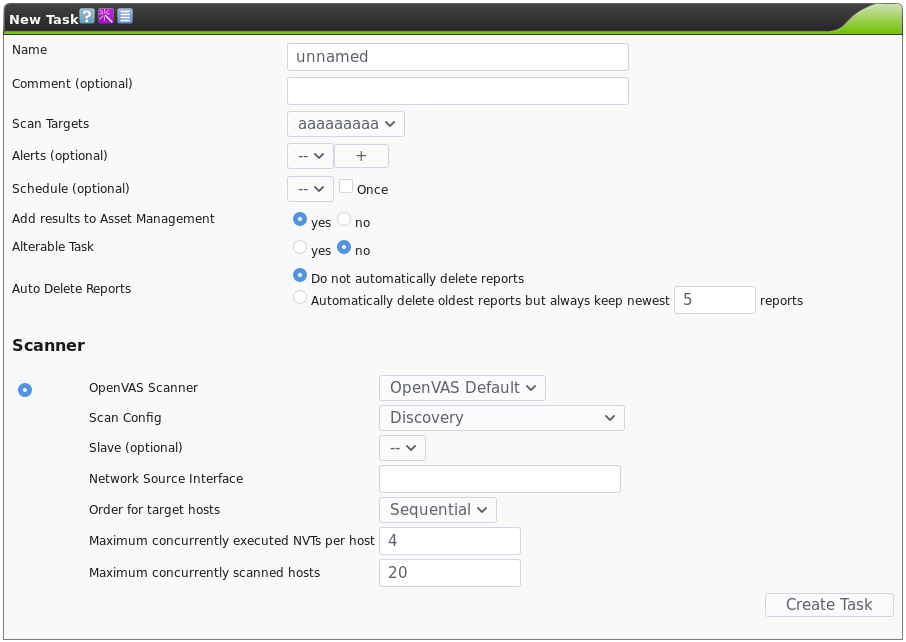 The new task dialogue to create a new scan task.
You can set the various configuration parameters to your liking using the different scan parameters we configured earlier in this guide. Once you’re ready to start the scan, you can create the task and it will execute your first scan accordingly!
Reviewing Results
Once you’ve started a scan, the GSA starts populating the “Reports” and “Results” tabs under the “Scan Management” tab. If you click on the Reports tab Scan Management -> Reports, you will be able to click through the different scans that you have run available. Clicking on a scan will bring you to the results tab for that scan, as seen below:
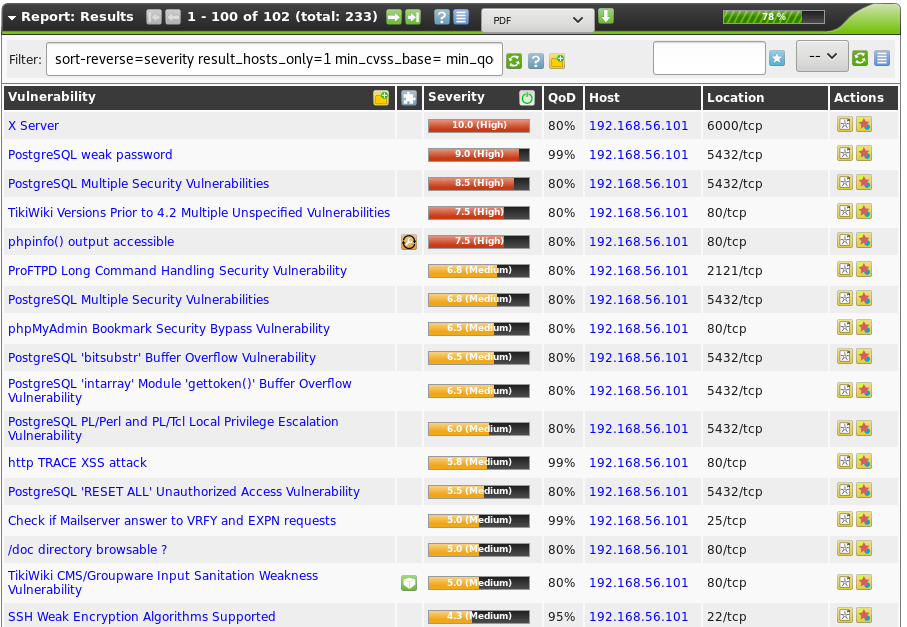 An example scan report
Clicking on an individual finding in a report will show you more information for that finding. The report can also be exported to a number of different output formats for further consumption and/or processing, including XML for parsing with code, or PDF or HTML for human-readable consumption. To do this, click the down arrow icon in the top bar of the Report dialogue.
This concludes our introduction to OpenVAS. Performing regular security scans of your enterprise network can be a great way to prevent issues before they are actively exploited. Please also refer to our previous post on this topic here.