Last updated at Mon, 06 Nov 2017 21:08:00 GMT

The Logentries Command Line Interface (CLI) allows you to both manage and use your Logentries service right from the command line. The CLI is built on the Logentries REST APIs and provides a tool to interact directly with the Logentries service outside of the UI. It is in beta and currently supports retrieving log events, and performing queries and calculations on log events using our powerful querying language LEQL. It also supports account, user and team management. New functionality will be continually added.
In this blog post I will give an overview of installing and using the various features of the Logentries Command Line Interface.
Installation
The Logentries CLI is open source and the code is available on github here: https://github.com/logentries/lecli
This means you can pull down the code and build/install it using setuptools.
If you have recent versions of Python installed, then you already have pip available and can simply install the package with the following commands:
On Linux or OS X:
pip install logentries-lecli
Note: On OS X you may receive an installation error if you are using native Python installation (six library). To get around this you must first install Python; the easiest way to do this is to use brew. For information on installing brew see here.Once you have brew installed then use the following command to install Python:
brew install Python
On Windows:
Python -m pip install logentries-lecli
Setting up the Configuration File
The default path to the configuration file used by the CLI is dependent on your operating system.
If you are running on OSX, the configuration file path should be:
/Users/
If you are running on Linux, the configuration file path should be:
/home/
You can manually create and add the configuration file to the required path, however a much easier way is to try and use the CLI with no configuration file yet configured. For example, try to get information on the account owner using the command lecli getowner.
The CLI will attempt to find the configuration file and if it cannot be found in the expected location, it automatically creates a default configuration file template that you can then populate with your account information.
In order to use the CLI you must first setup the configuration file with your API keys. Your account API keys are available at logentries.com by logging in to your Logentries application and going to the account management section and then selecting the API Keys tab. Here you will get access to your Account Resource ID and be able to generate your Owner key and key ID, Read/Write and Read-Only API keys. Note that only the account owner is allowed to generate an Owner API key. If you don’t already have a Logentries account you can start a free 30-day trial here.
Querying of events and logs only requires that you have configured the Read/Write or Read-Only API key. To perform user, team and account management via the CLI, an owner API key, key ID and account resource ID is required.
Generate your required keys and then copy them into the Auth section of the CLI configuration file. The Auth section of your configuration file should look like this:
[Auth]
account_resource_id = 912345678-aaaa-bbbb-1234-1234cb12345a
owner_api_key_id = 12345678-aaaa-bbbb-1234-1234cb12345b
owner_api_key = 12345678-aaaa-bbbb-1234-1234cb12345c
rw_api_key = 12345678-aaaa-bbbb-1234-1234cb12345d
Basic Usage
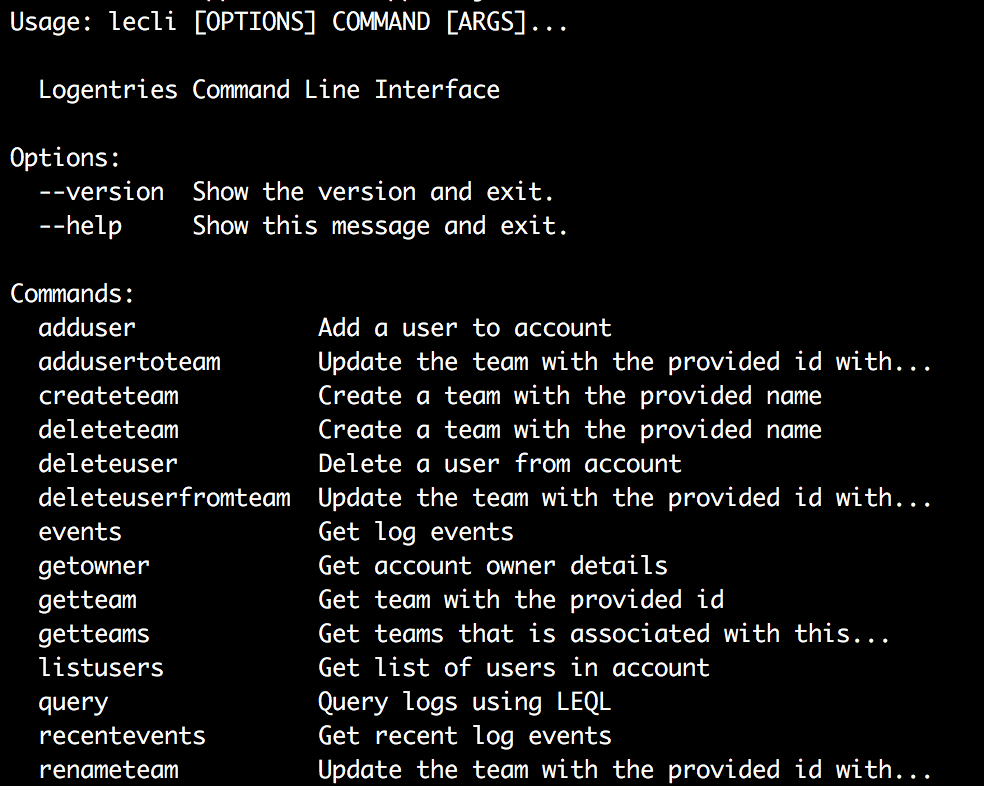
Once installed the CLI can be used with the lecli command. This will display the list of available commands and options.
To get information on how to use each command, simply call lecli followed by the specific command you want more information on. For example, to get more information in the recent events command:
lecli recentevents
This will display the following usage information.

You will notice as we go through each of the different lecli commands that many options have both a long and short form.
Query and Events
The event and query functionality of the CLI supports a number of different ways to query events and statistics. I will describe each of these in detail below.
Recent Events
The recentevents command allows you to retrieve the most recent log events that have been sent to Logentries. The logs from which to retrieve log events can be specified in a few ways. The Log keys can be passed directly as a space separated list of log keys, or you can take advantage of log groups and log nicknames. Log keys can be obtained via the Logentries UI by selecting a specific log and then selecting the settings tab. On this page you will see two UUkeys, a token and Key, the key is the log key you need to use to query that log.
Log nicknames can also be passed using the --lognick``-n arguments, log groups can be passed using the --loggroup``-g arguments. I will describe lognicks and loggroups and setting them later in this blog in the ‘Log Nicknames and Groups’ section.
By default the recentevents command will return events for the last 20 minutes. The command also takes an optional time argument that allows you to specify how far back in time you wish to get events from; this is passed using --last or -l argument.
Some examples of using the recent events command are:
lecli recentevents <logid> -l 200

lecli recentevents -n mynicknamedlog -l 200

lecli recentevents -g myloggroup -l 200
Retrieved log events will be printed to the terminal with the Logentries timestamp in red as shown here:

Events
The events command allows for the retrieval of log events within defined time ranges. As with recentevents, logs can be passed to the events command as a space separated list of log keys, or you can take advantage of log groups and log nicknames.
The events command accepts time ranges in ISO-8601 human readable time format (YYYY-MM-DD HH:MM:SS); time ranges in this format can be passed using the --datefrom and --dateto arguments. Note, all time values are in UTC timezone.
The command also accepts epoch time with second granularity. Epoch format time parameters can be passed using the --timefrom``-f and --timeto``-t arguments, note the long and short form of these options.
Some examples of how to use the events command are:
lecli events 12345678-aaaa-bbbb-1234-1234cb123456 -f 1465370400 -t 1465370500

lecli events 12345678-aaaa-bbbb-1234-1234cb123456 --datefrom '2016-05-18 11:04:00' --dateto '2016-05-18 11:09:59'

lecli events --loggroup myloggroup --datefrom '2016-05-18 11:04:00' --dateto '2016-05-18 11:09:59'

lecli events --lognick mynicknamedlog --datefrom '2016-05-18 11:04:00' --dateto '2016-05-18 11:09:59’
Query
The query command allows you to run queries on your logs right form the command line using the our log querying language LEQL. For information on using and getting the most from LEQL check out the LEQL documentation here: https://logentries.com/doc/search/
Logs can be passed to the query command using a space separated list of log keys, log groups or log nicknames. As with the events command, query accepts time ranges in ISO-8601 human readable time format (YYYY-MM-DD HH:MM:SS); time ranges in this format can be passed using the --datefrom and --dateto arguments. It also accepts epoch time with second granularity. Again, epoch format time parameters can be passed using the --timefrom``-f and --timeto``-t arguments.
Any LEQL query type that can be used in the Logentries UI can also be used with the query command. The LEQL query is passed as a string using the --leql``-l argument.
A query can return three types of results. For searches just using a where() and without any calculate or groupby functions the CLI will print the list of matching log events. Other queries will return either timeseries or grouped data, the CLI will pretty print both of these.
Similar to log nicknames, query nicknames allow well known queries to be set in the configuration file and easily used as part of a query command. A query shortcut can be used instead of a leql query using the --querynick``-q argument. I will explain how to set these in the next section.
Some examples of how to use the query command are:
lecli query 12345678-aaaa-bbbb-1234-1234cb123456 -q 'where(method=GET) calculate(count)' -f 1465370400 -t 1465370500

lecli query 12345678-aaaa-bbbb-1234-1234cb123456 -q 'where(method=GET) calculate(count)'  --datefrom '2016-05-18 11:04:00' --dateto '2016-05-18 11:09:59'

lecli query --loggroup myloggroup --leql 'where(method=GET) calculate(count)' --datefrom '2016-05-18 11:04:00' --dateto '2016-05-18 11:09:59'

lecli query --lognick mynicknamedlog --leql 'where(method=GET) calculate(count)' --datefrom '2016-05-18 11:04:00' --dateto '2016-05-18 11:09:59'

lecli query --lognick mynicknamedlog -q testquery --datefrom '2016-05-18 11:04:00' --dateto '2016-05-18 11:09:59’
Log Nicknames, Log Groups, and Query Nicknames
The CLI supports the use of log nicknames and log groups via the configuration file. This makes searching frequently queried logs or large lists of logs much simpler as you do not need to pass in lists of log keys.
Log nicknames allow an alias for a single log to be configured, this is done in the LogNicknames section of the configuration file.
[LogNicknames]
testlog = 12345678-aaaa-bbbb-1234-1234cb123456
Log groups allow an alias for a list of log keys to be created. These can be setup in the LogGroups section of the configuration file.
[LogGroups]
testgroup =
    12345678-aaaa-bbbb-1234-1234cb123456
    12345678-aaaa-bbbb-1234-1234cb123457
Query nicknames provide an easy way to add aliases for long or frequently run queries. These are setup in the QueryNicknames section of the configuration file.
[QueryNicknames]
testquery = where(logkey) calculate(count) timeslice(30)
User and account management
The user and account management functionality of the CLI can only be used with a valid Owner API key. The configuration file must contain the account_resource_id, owner_api_key_id and owner_api_key in the Auth section. These are all available from the account management and API keys section at logentries.com.
List Users
The listusers command returns a list of all users that have access to the account for which the CLI has been configured. The command will return the users first and last name, email address, user key and the last time they logged in.
Example usage:
lecli listusers
Add User
The adduser command allows you to add a user to your account. There are two ways to add users, depending on whether they are a new or existing user.
To add a new user (who is not already part of another Logentries account), you must provide their first and last name, and email address. If successfully added the CLI will print the users account information, including their newly generated user key. A user added via the CLI must then go to https://logentries.com/user/password-reset/ and enter their email address. They will then be sent a link that they can use to setup the password for their new account.
A new user can be added using the following command:
lecli adduser -f John -l Smith -e john.smith@email.com
To add an existing user to your account (i.e. a user that already has a Logentries account, even if not associated with your account), you must first obtain their user key. The user can obtain their user key from the profile tab of the account management page of their Logentries application.
An existing user can be added to your account using the following command:
lecli adducer -u <userid>
Delete User
The deleteuser command allows for the removal of a user from your account and deletion of the user’s account from Logentries. If the user is associated with only your account, then the user’s account will be deleted. However, if the user is associated to any other account, then access to your account will be removed but the user’s Logentries account and any association to other accounts will remain.
To delete a user use the following command:
lecli deleteuser -u <userid>
Account Owner
The getowner command allows you to retrieve the details of the account owner, this is done using the following command:
lecli getowner
Team Management
Team management allows you to group users with whom you have shared access to your account. You can then restrict teams so its members can’t modify users, logs, or the datahub. Teams can also be used to send alerts to multiple recipients. If included in an alert, all members of a team will be notified. (For more information on teams see here).
Team management using the CLI requires a valid read-write API key in your configuration file. The configuration file must contain a valid account_resource_id and rw_api_key in Auth section.
The getteams command will return a list of all teams that have been configured in your account. This command will return the team name and team UUkey:
lecli getteams
To get information about a specific team and a list of users in the team:
lecli getteam <team id>
A new team is easily created with the following command:
lecli createteam <name>
To delete a team you need the team key which can be obtained using the get teams command
lecli deleteteam <team id>
To rename a team:
lecli renameteam <team id> <team name>
To add a user to a team:
lecli addusertoteam <team id> <user id>
And finally to delete a user from a team:
lecli deleteuserfromteam <team id> <user id>
The Future
The Logentries command line interface tool will continue to evolve and exciting new features will be continually added as the Logentries REST API evolves. Coming up next, you will soon be able to manage all of your logs and log sets using the command line.
Ready to get started with the CLI?
Sign up for a free 30-day Logentries trial to try out the CLI. Click here to get started.