Last updated at Mon, 06 Nov 2017 20:35:17 GMT

React.js has proven itself a powerful contender in the world of Javascript frameworks. Arguably, it has become one of a handful of libraries that all web developers should consider for current or upcoming projects. Understanding how it integrates with other libraries in your technology stack is an important part of that consideration. If you currently use, or are considering using Logentries, then how Logentries and React.js integrate is a significant factor. This article will shed some light on their interoperability.
The Code for this Article
The sample code used throughout this post can be viewed on GitHub here.
Building and Compiling
Writing a React application can be straightforward, but loading it into a web browser can feel daunting to newcomers. Except for very specific circumstances, React requires pre-processing before being opened into a browser. You will need a build tool, like grunt, gulp, or webpack. The sample uses webpack. Webpack runs using a configuration file like this one used by the sample:
Webpack uses Node.js under the covers so we can access Node’s standard modules. The first line loads one of those modules, called path, which obfuscates the pathing differences between platforms. Using the *path *module means that this builds correctly on any file system Node supports: Windows, Unix, Mac.
The configuration file tells webpack where to start building the app from and where to output the result. The entry property shows webpack where the application begins. In this case, it is initiated from the app directory and a module called index (the .js extension is assumed). It outputs to the app directory into a file called bundle.js.
This portion of the config file deals with where to start and where to finish. However, our code also needs to be compiled during the build. We need to load a module to do the compilation. The module loader Babel is excellent for this purpose.
I find Babel to be the easiest and most common processing tool for React. Babel compiles your Javascript into a version of Javascript supported by most, if not all, browsers. We configured Babel to be able to compile React code and to compile code written with the newer Javascript class syntax.
Our configuration file is modified with the following module loading code:
The are a few properties we have set for the compilation:
- The test property tells Babel to run anything that matches the test criteria. The regular expression indicates that anything with a .js or .jsx extension should be processed.
- The **include **array tells Babel which folders to recursively search for files. In our case, that is everything in the app/js directory and the app/index.jsx file.
- The loader is the name of the loader module.
- The query sets module specific settings which are the es2015 and react preset packages.
That’s the build and compile process around the sample. Now let’s look at the code.
The Code
The Indexes
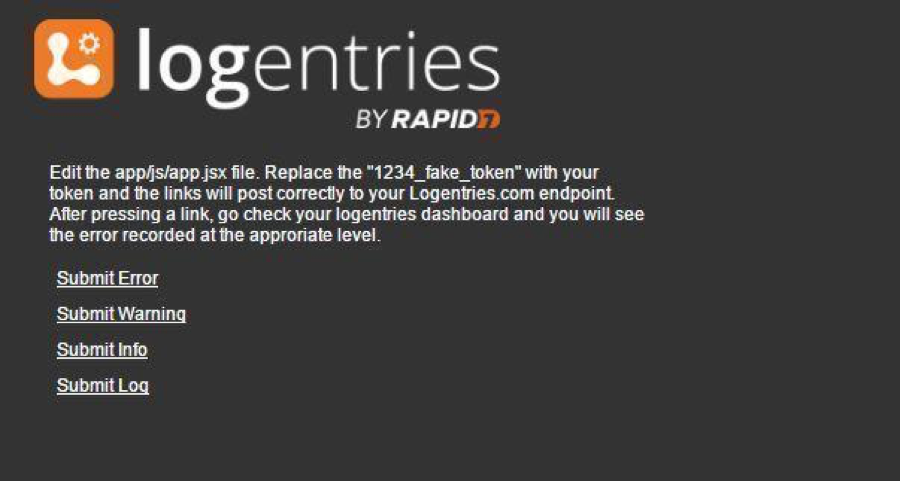
If everything built properly, app/index.html should look like this in a web browser. The text reminds the user to update the token in the app.jsx code and to check their logentries account after pressing a link. Clicking a link will send a log entry to Logentries.com with the appropriate type. Everything below the logo has been inserted by React. Let’s take a look at how the page is built.
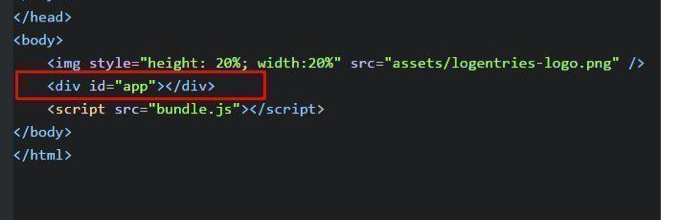
The natural starting point is in the index.html page. True to most React applications, this page is pretty simple and barren. The only item of note is the div tag with an id of “app”. This is where React inserts itself.
The React application starts with the app/index.jsx:
The top layer of a React application sets up the context and the initial rendering. The page loads react, react-dom, and App. React-dom is the library used for rendering into a web page. App is the component we see on the page.
The render method is rendering “
This index page uses React’s JSX syntax. JSX was designed to format React code using semantic HTML. Semantic HTML uses tags to describe the function of the HTML as well as its presentation. Using App as a tag is semantic since it tells the developer what the tag is expected to do. In this case, that is to load the App module.
App.jsx
The App.jsx file, in the app/js directory, is where most of the sample application exists. The application is loading the text, the links, and setting up the link clicking functionality. The top level instantiates the modules and variables needed in the rest of the application.
The first module, React, is the only module called out that is not explicitly used. This is a special case. React is required at the top level for the compiler. The compiler needs the React reference so it can parse the HTML tags in the render function properly.
The Logger invokes next. The Logentries code sits inside the Logger module. The module is a simple interface to the Logentries object. The last four references set up variables that we will use as constants in the rest of the application.
The bulk of the render function is standard HTML and React. The only piece that might be different for users new to React are the style tags. The React compiler will need to parse the style tags as Javascript literals so the properties are surrounded by a {{ }}. The first set of curly braces is an escape clause to tell the compiler to treat the contents as Javascript. The second set of braces means the contents are a Javascript literal. Everything inside the curly braces needs to be put into camel case to pass Javascript formatting.
The anchor tags is where the functionality is set:
Each anchor has a defined click event using the onClick handler. They invoke the sendLog function which is defined in the bottom part of the class. The curly braces tell the compiler that the following is Javascript code. The context for each handler is the class, so *this *refers to the instantiated App object. Bind makes sure the function uses the value appropriate to that link (“error”, “warn”, ”info”, “log”).
The final function in the class is called sendLog, and it looks like this:
sendLog invokes a method on the Logger object that corresponds in name to the type. The click handlers could be translated to pseudo code as:
onClick={Logger.error(‘error message’)}>Submit Error
onClick={Logger.warning(‘warning message’)}>Submit Warning
onClick={Logger.info(‘info message’)}>Submit Info
onClick={Logger.log(‘log message’)}>Submit Log
If you are familiar with the console API, or the Logentries Javascript API, this might look familiar.
Logger.jsx
Logger.jsx is the interface to the Logentries object. At the time of this writing, the Logentries object is globally instantiated against the window object. Adding the Logentries object to the window means it could be used without an interface.
Logging from Javascript Apps
You can log to Logentries from any Javascript application with the open source le_js library.
Create a free Logentries account and then check out the le_js documentation.
See also: The Logentries node.js library and the sample code from this post for react.js.
The code looks like this:
The first line calls up the Logentries library. The require statement allows us to construct the Logentries object inside this module. Also, the require line tells the compiler where to find the library and to include it in the bundled code.
The module.exports line is used by other modules as a constructor. So other libraries, including ours in the previous section, can require and create the Logger object simultaneously. The sample uses this line for that purpose:
The Logentries object initiates itself through the init command, per the Logentries documentation. Once initialized the LogEntries object returns to the caller for use. The methods and properties accessible at that point are in the documentation.
Conclusion
The biggest challenge with React can be it’s build process which is what makes this sample most useful. The basics that are required to properly build your code with the Logentries library, and how to use the library, have been set up here for easy reference. Good luck and if you have any questions please contact support.
Happy Logging!
The sample code used throughout this post can be viewed on GitHub here.