Last updated at Fri, 21 Jul 2017 19:20:26 GMT
ControlsInsight retrieves data from Nexpose, so it is important to make sure that the site is properly configured. In this blog post, we will go through a step-by-step procedure of setting up a site configuration that will enable ControlsInsight to report on all Windows assets. We will also go through a scenario to troubleshoot why an asset did not make it into ControlsInsight.
Step 1: Things we need
- The list of assets to be scanned either by IP range or hostnames
- ControlsInsight currently supports windows desktop operating systems like Windows XP, Vista, Windows 7 and Windows 8. Make sure to note the appropriate count of these assets for book keeping.
- Administrator credentials
- Scan template – Full Audit Scan Without Web Spider
Step 2: Nexpose site creation
- Create a new site on Nexpose with the following details:
- Name: LA Systems
- Assets: 10.4.27.138, 10.4.31.174
- Scan Template: Full audit without web spider
- Scan Engine: Keep the default – Local Scan Engine (if you have bought a complete engine and console license)
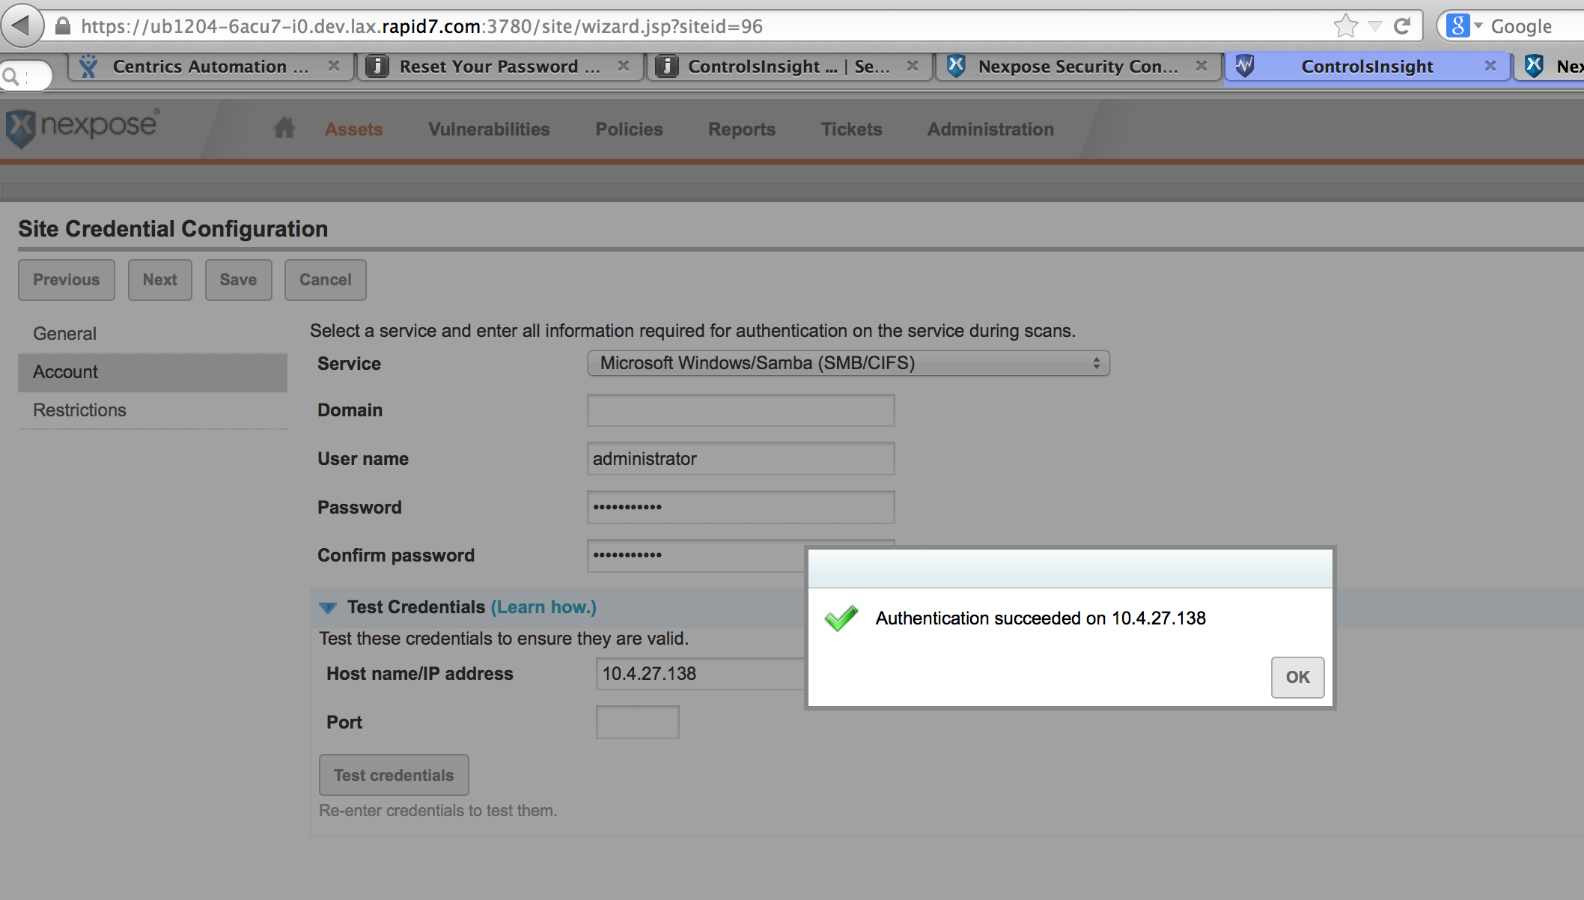
- Credentials: Make sure to add the domain, username and password details
- It is also important to do a verification by entering the IP address and verifying that the credentials succeed.
Step 3: Kick off Scan
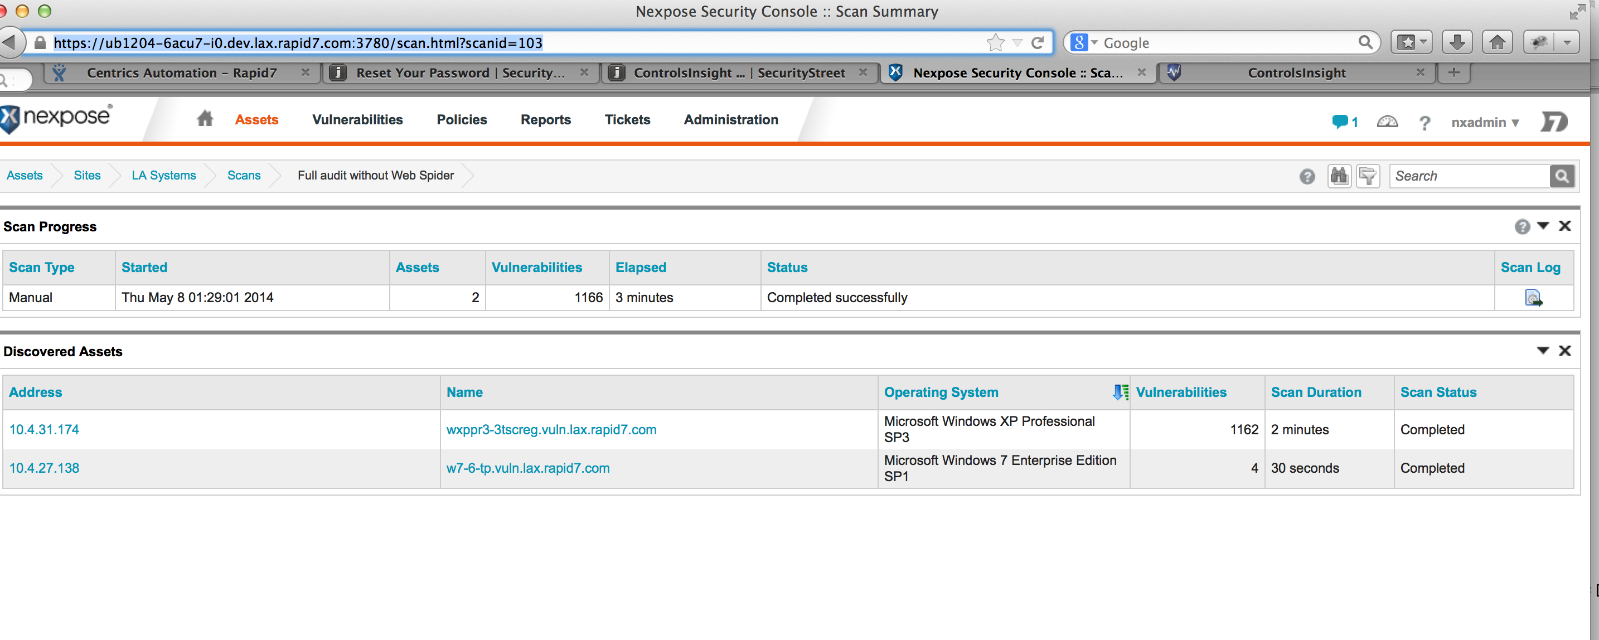
As shown in the screenshot, kick off the scan and wait for the scan to complete.
Step 4: ControlsInsight home page
- Navigate to ControlsInsight by clicking on the “R7” link in the top right corner of Nexpose
- Login to ControlsInsight with either Nexpose global admin or ControlsInsight-only user credentials
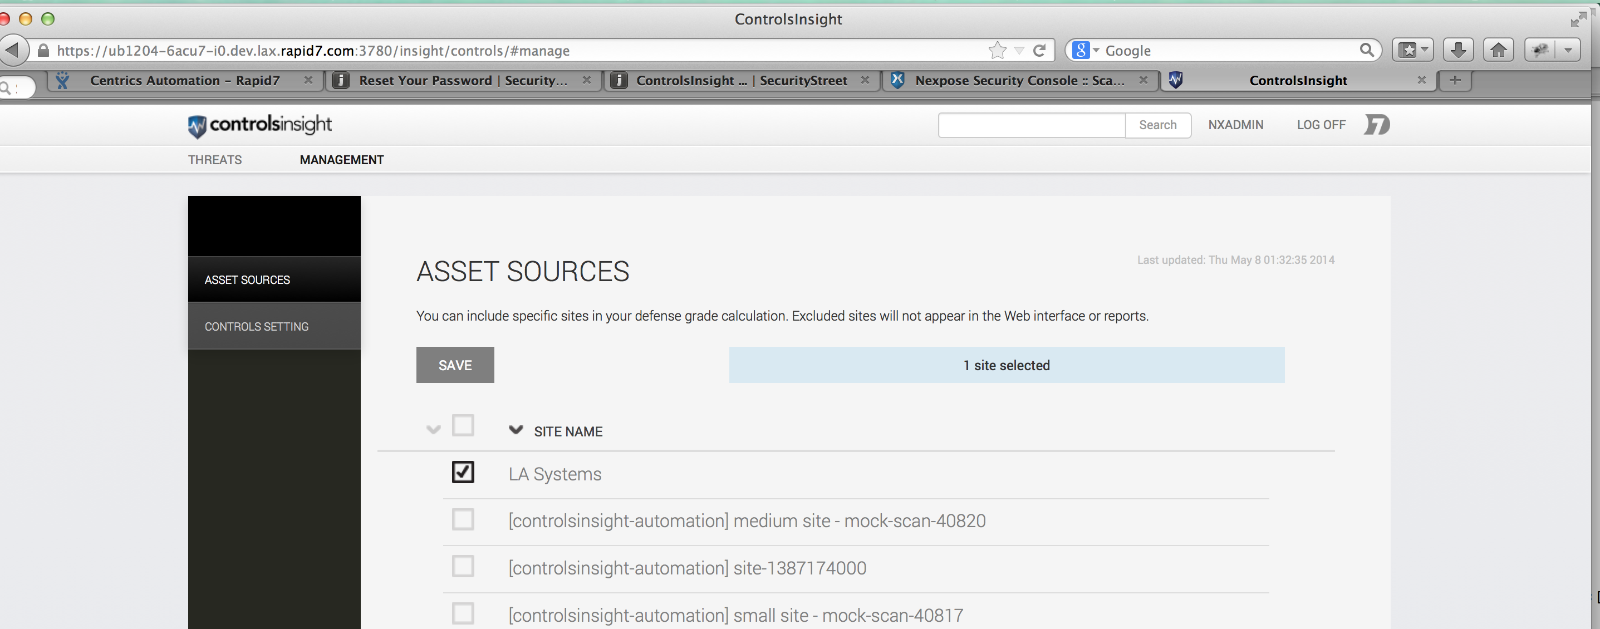
- Go to “Management” page and make sure “LA systems” site is selected as shown in the screenshot. It doesn't matter if the other sites are also selected, but for simplicity, in this example only one site is selected.
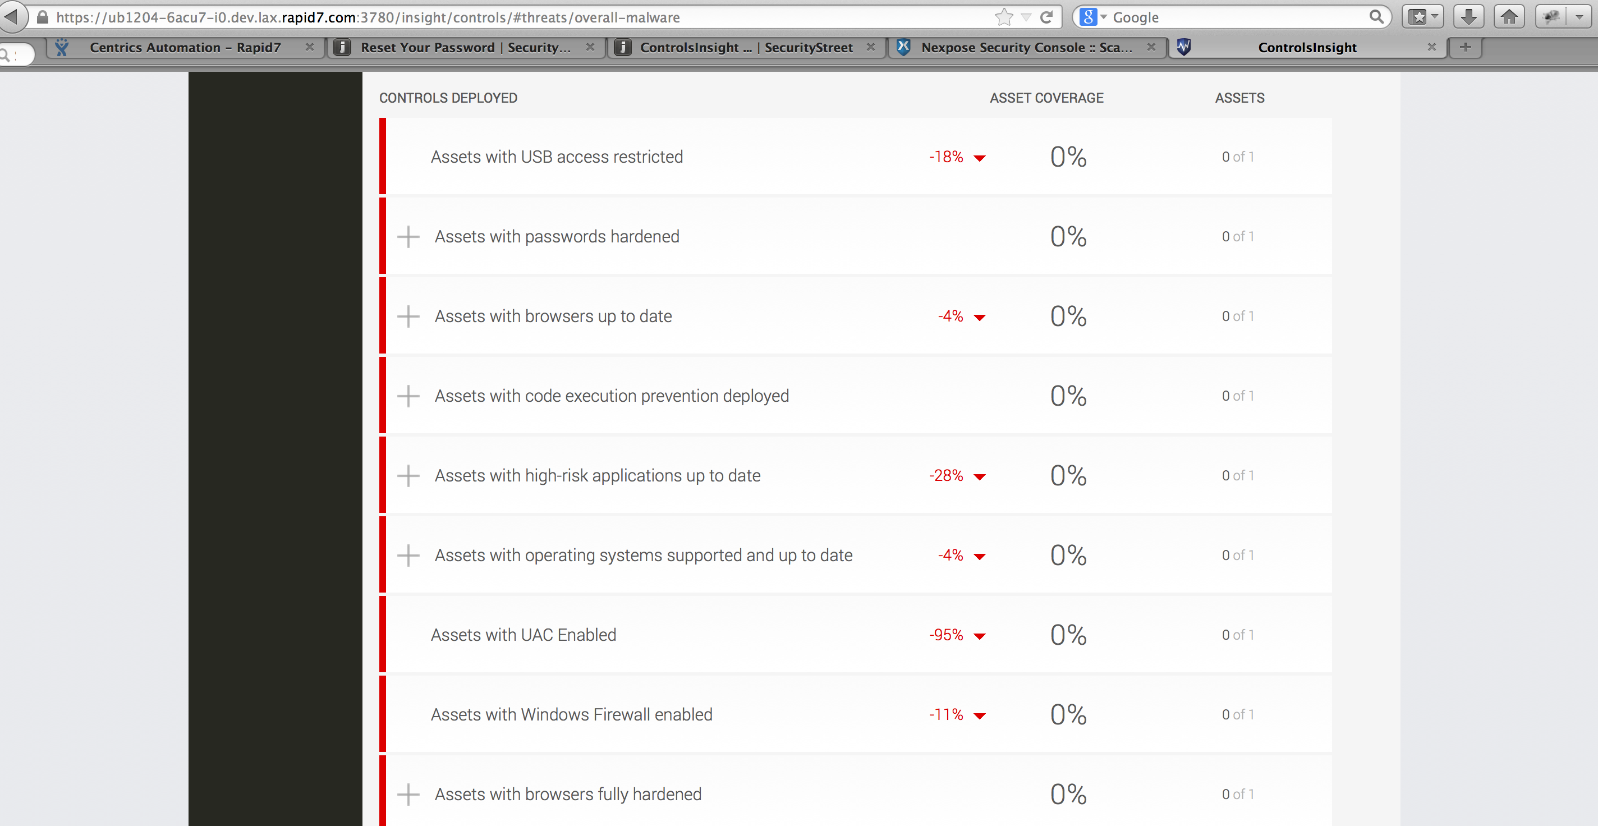
- Navigate to the Threats page by clicking on the “Threats” link on the left hand side top corner
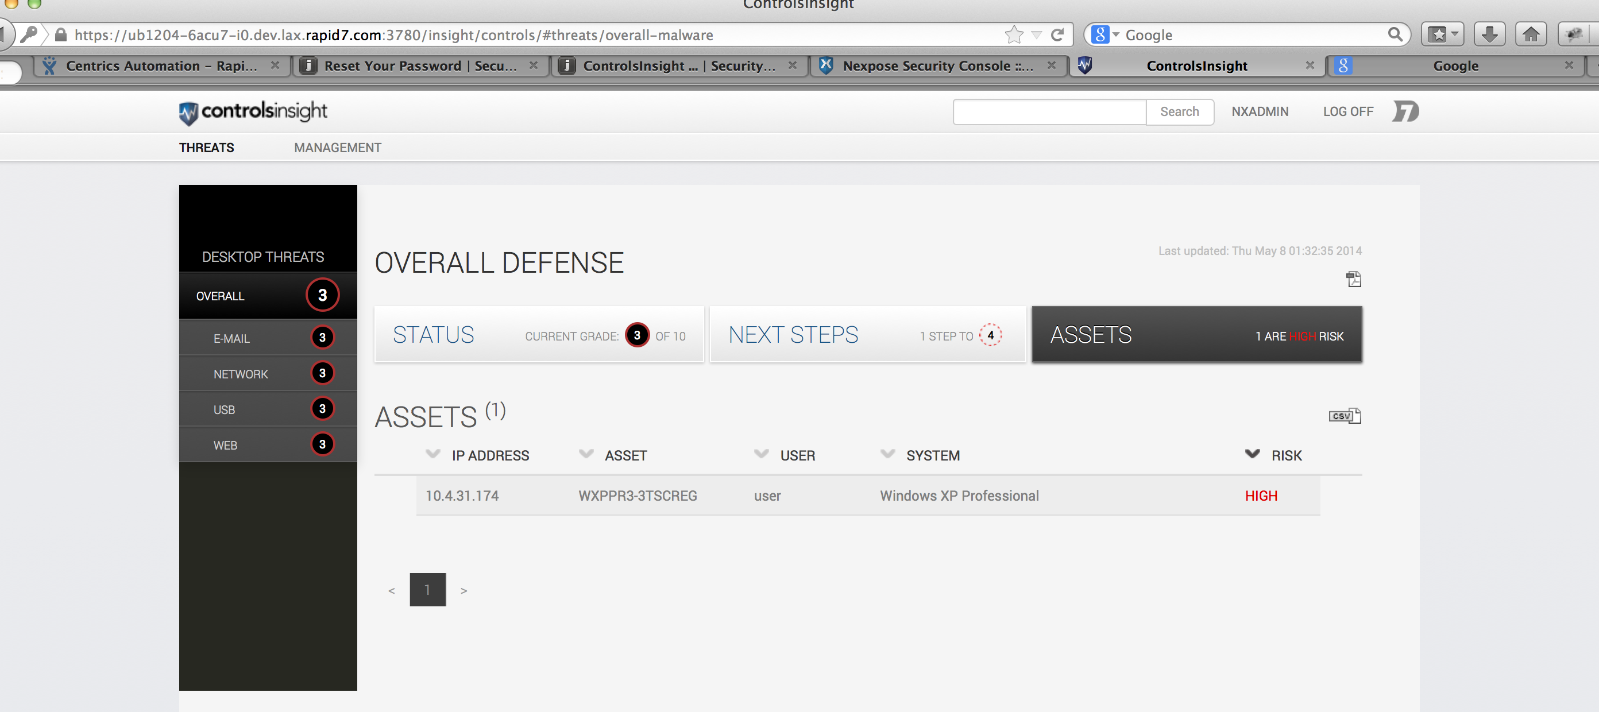
- Clicking on the “Assets” tab shows that there is only one asset listed. Now, let's figure out why we are not able to see the other asset.
Step 5: Troubleshooting the missing asset in ControlsInsight
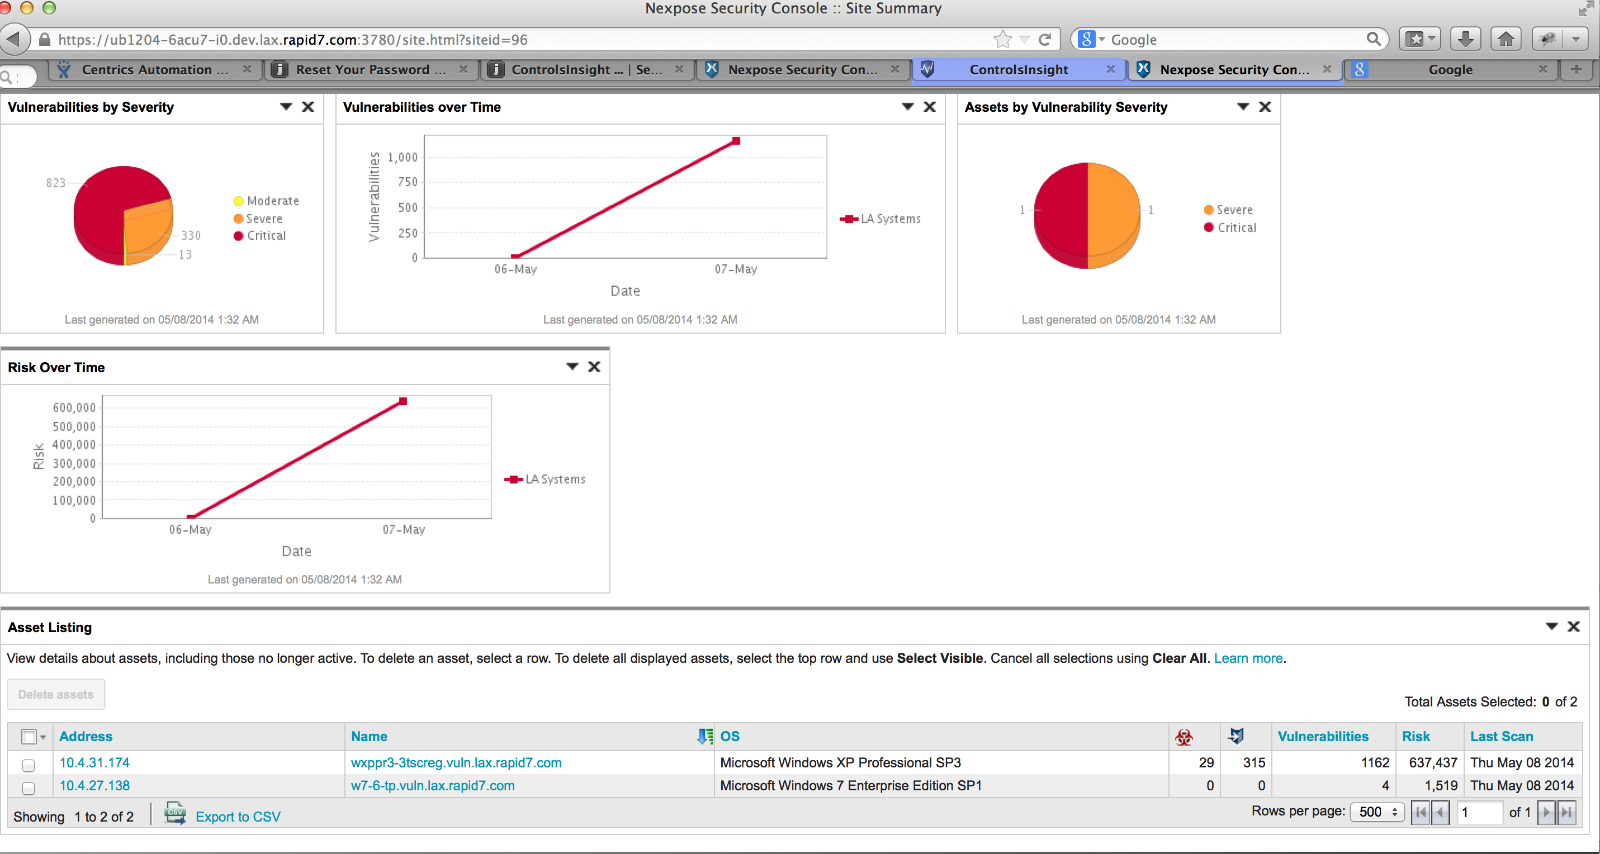
- In the previous section, we found out that there is only one asset “10.4.31.174” present in ControlsInsight. The asset with IP 10.4.27.138 is missing from the asset table as shown in the below screenshot:
- Currently, Nexpose is the only data source for ControlsInsight so let's navigate to Nexpose and look at the details of the site and the assets.
- Go to Nexpose and click on the site “LA Systems”. As shown in the screenshot, the asset with IP 10.4.27.138 has 4 vulnerabilities found where as the 10.4.31.174 has lot more. This gives us an indication that something is messy with asset 10.4.27.138.
- Digging further, we click on the asset 10.4.27.138 and are now at the asset detail page. Enable “fingerprint listing section” by clicking on the link on the top right corner as shown in the snapshot:
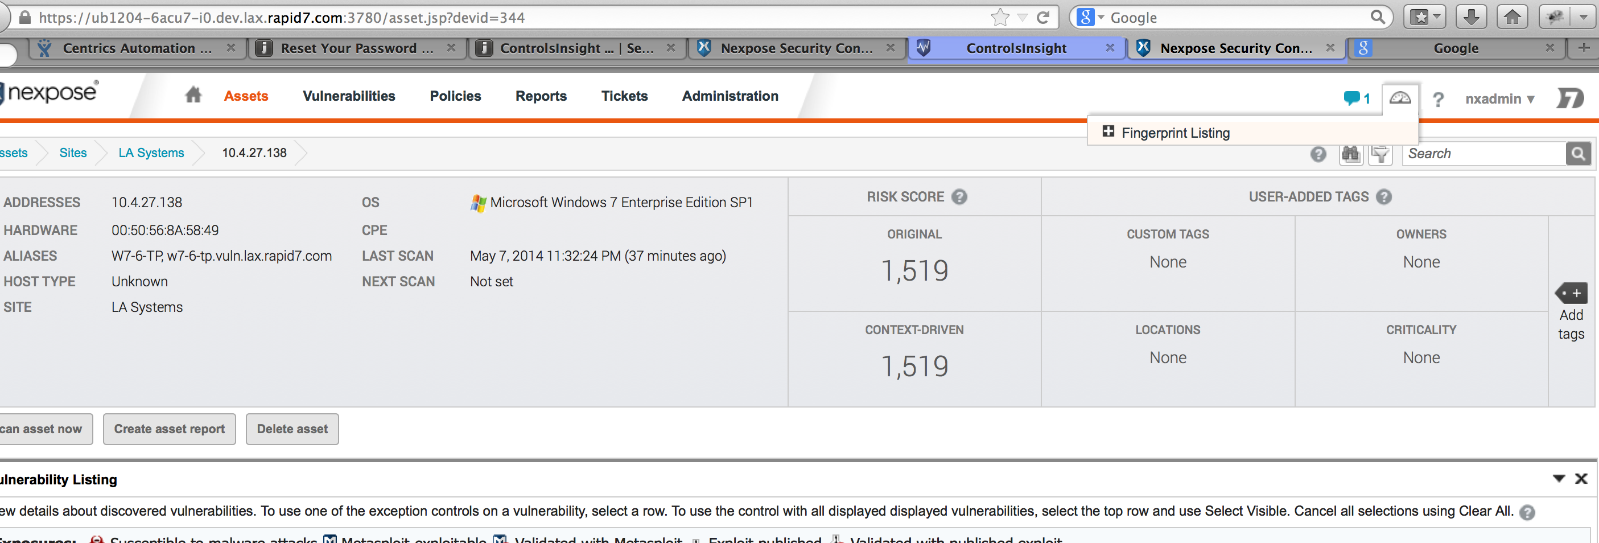
- Going to the bottom of the page, we will find that the fingerprint listing shows that the highest certainty it reached was 0.85. ControlsInsight will only pull in assets when the certainty is 1.0.
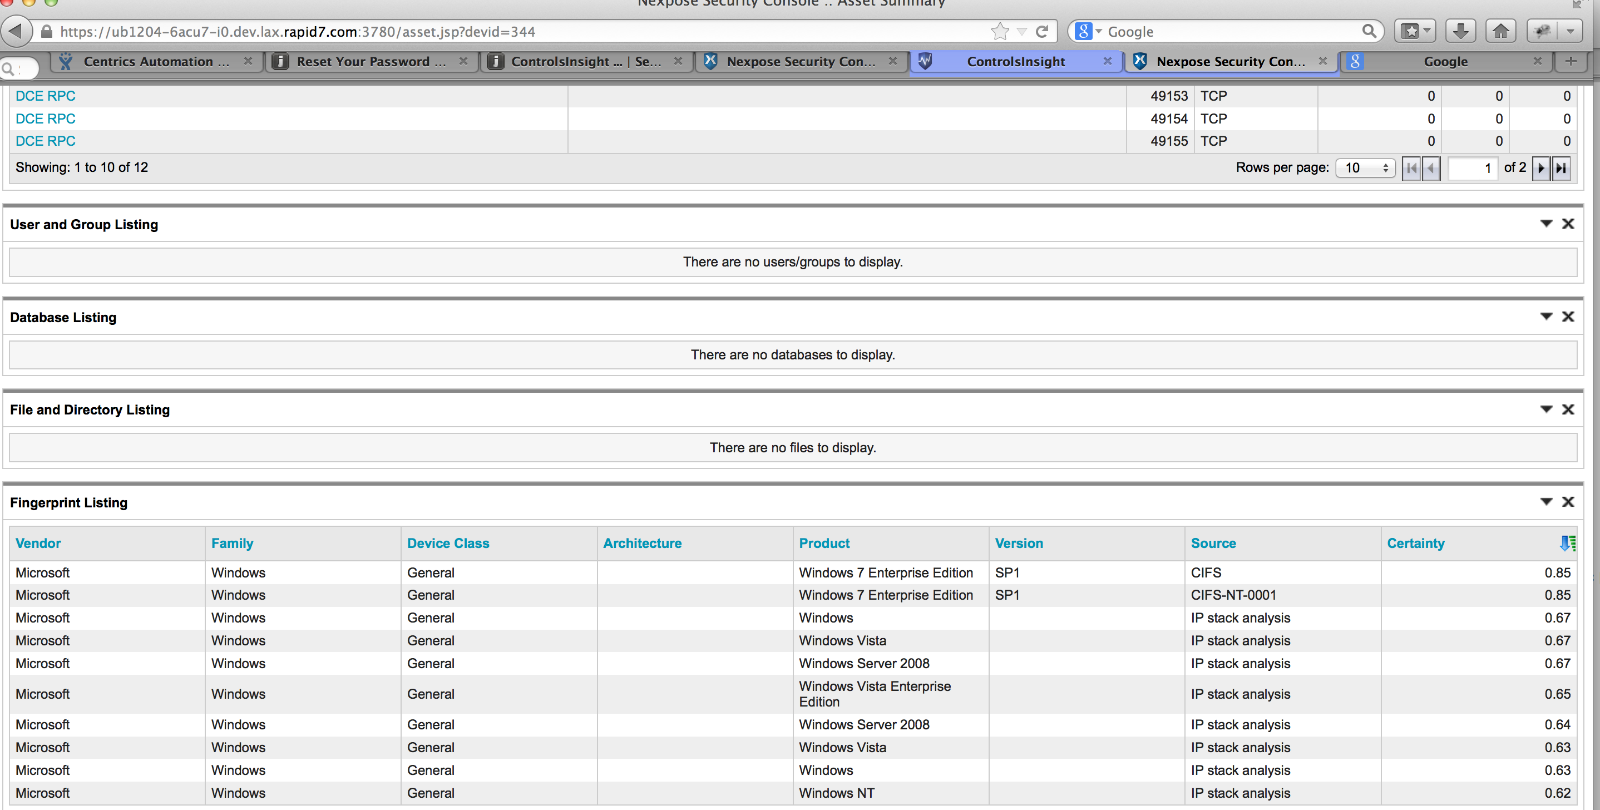
- When we navigate to the asset detail for 10.4.31.174 we see that the fingerprint certainty is 1.0 so we were able to get that asset in ControlsInsight.
- To solve this issue, we need to add the right credentials during site creation. We can change or add more credentials by going through the “manage site” process. This time let's make sure to do the credential verification by using the asset 10.4.27.138
ControlsInsight depends on the data collected from Nexpose to assess controls coverage and provide prioritized guidance. Validating proper site configuration will help ensure that all assets are being accurately assessed.
